Posts

ThermOWeb & Whimsy Stamps Collaboration

Image
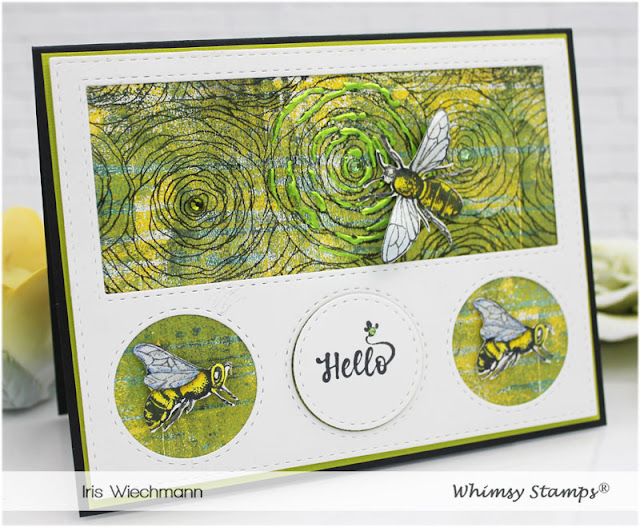
Hello Everyone! Welcome to my blog today where I share my creations for the  This week  Whimsy Stamps  and  ThermOWeb  are partnering for a fabulous week of inspiration and prizes!  All week long designers from both teams will be sharing ways to add foils and more to your projects using products from ThermOWeb and Whimsy Stamps.  Read to the end of this post to find out how you can win! For my first card today I used Whimsy's  Friend Word and Shadow die set  from the February release as well as the  Card Builder Windows die set .  I die cut the large shadow from ThermOWeb's double sided white  Foam Adhesive  and applied  Deco Foil in the color Lime green  which has a nice satin sheen. I die cut the word friend from black cardstock and layered it on top of the lime green shadow. The lime green cardstock panel was die cut using the  Card Builder Windows die set .  My marbled background was created with Alcohol Inks on YUPO paper. Where the in

Whimsy February Release - Bee-utiful Bees & Spiral Roses

Image
I am back today with another creation showing some of the new February Release items at Whimsy Stamps !  On my card I used the Spiral Rose BG , Bee-utiful Bees rubber set and the Peekaboo Window 3 die. The background I used was made using the gel print technique and acrylic colors and different other Whimsy stamps and stencils. I will have another blog post soon with more details on how I use Whimsy products and this fun and artistic technique to create beautiful backgrounds. To give some extra detail to one of the roses I used Deco Foil transfer sheets in satin lime green and Deco Foil Liquid Adhesive.  I colored the bees with Copics to match the colpor scheme of my background. I've added shimmer to their wings using a Wink of Stella clear brush pen. Some crystal gemstones finish off my card. Whimsy Goodies used:                                 Thanks for visiting and have a wonderful day!

Whimsy Stamps February 2019 Release - Penguin Poop

Image
Hello Crafty Friends! I am back today with my creation for the Whimsy Stamps February Release. I used the super adorable Penguin Poop clear set on a CAS layered card...well at least for me it is still CAS because usually my layered cards are way more embellished. I colored the image with Copics, fussy cut it and put it on a punched out circle. The background on the circle was created using yellow distress ink that I had watered down a bit and sprinkled it on with a brush. To create the different layers behind the image I used the gorgeous NEW  Chilly Papers and die cut the shapes with the Notched Squares and Notched Rectangles . The funny sentiment that is one of the sentiments included with the set was stamped with Versafine Clair Nocturne ink on blue DP, also from the  Chilly Papers . The Happy Birthday sentiment from the same set was stamped with Versamark ink onto purple DP and white heat embossed. I then die cut the sentiments with the  Quick Strips die set .

Celestial Thanks

Image
Hello Crafty Friends! Today it's back to my roots. I haven't made a shabby chic and layered card like this in ages. When I saw this cute fairy by Marina Fedotova I knew instantly that she will be colored with distress inks and put on a shabby chic card with lots of layers and die cuts. Here is how it turned out: The adorable fairy is called 'Angel Celeste' and I colored her with distress inks (see list of colors used below). The sentiment is the NEW Thanks Word and Shadow die . Both the fairy and the word die are available in the store now. The leaf die cuts I used to decorate my card are from the Leaf Foliage2 die set and from the Christmas Branches die set. I also added lots of flowers from my stash, metal embellishemnts and cheesecloth.  To complete the look I've sponged some of the paper layers, die cuts and flowers with white gesso, added different shaped pearl embellishments and  Stardust Stickles .  Here is a list of dist