Posts

Showing posts from March, 2021

Spectacular Zen Garden Flowers

Image
Hello Friends! I'm here today with my last card for this month. I was inspired to do a mixed media project using the beautiful flower rubber stamp  Zen Garden f rom Deb's stamp line at Whimsy . I also used many other stamp and stencils available in the Whimsy store that I linked below.  Whimsy products used: Thanks for stopping by and remember tomorrow is release time again at Whimsy Stamps!  Come back here for more inspiration. Hugs,

Whimsy Stamps and Cardstock Warehouse Instagram Collabortion Hop

Image
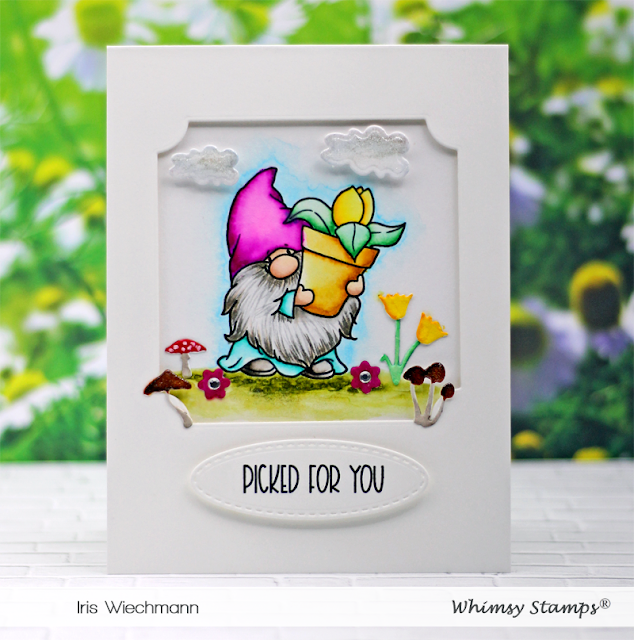
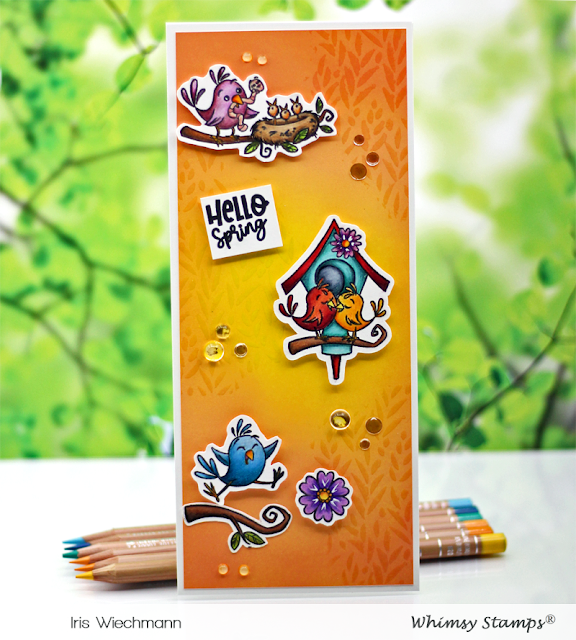
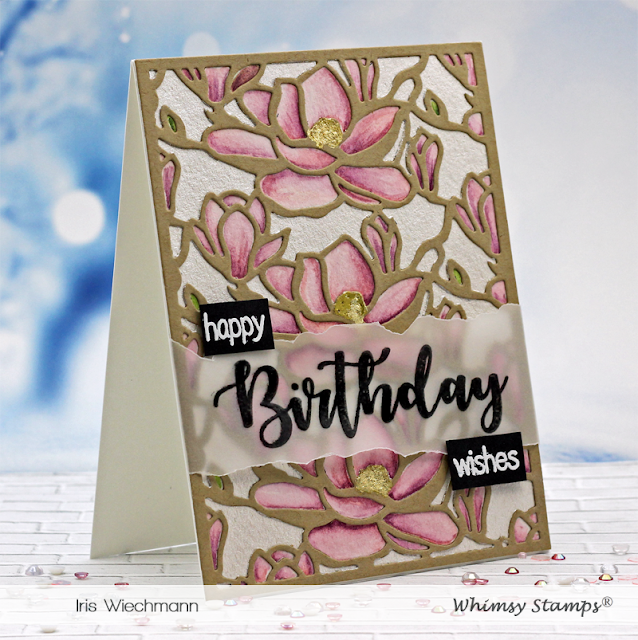
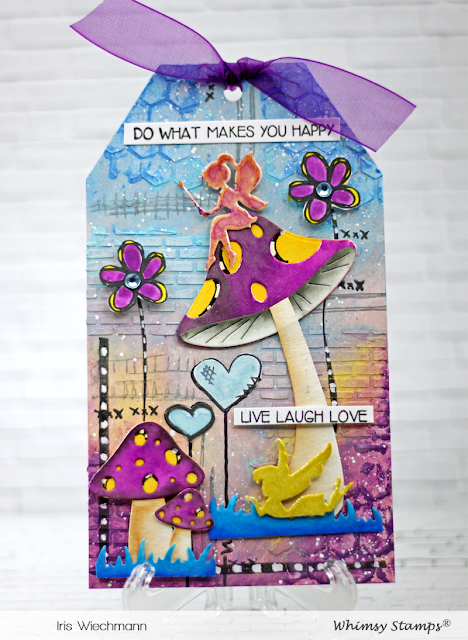
Hello Crafty Friends! There is an Instagram collaboration hop going on - Whimsy Stamps and Cardstock Warehouse are teaming up for a week of inspiration and prizes! Just hop on over to my Insta accound @iriswiechmann and there you will find all the info, links and  how to participate!  I've created two projects using the awesome cardstock from Cardstock Warehouse combined with some of my new favorite Whimsy stamps and dies. On my first card I used  @whimsystamps  Magnolia A2 die together with the Celebrate Word and Shadow die. The cardstock from  @cardstockwarehouse  I used is from the pop-tone collection: sour apple, from the earth tone collection: chocolate and the White Diamond print inkjet glitter cardstock as well as silver mirricard mirror cardstock. Here you can see the sparkle and shimmer of the  White Diamond print inkjet glitter cardstock and the silver mirricard mirror cardstock. On my second card I used orange fizz, kraft and chocolate cardstoc

Picked For You!

Image
Hello & Happy Spring!  These little Gnome Gardeners from Whimsy Stamps Crissy Armstrong collection make the perfect images for Spring cards. They are from Whimsy's newest release and available in the store . The image was stamped onto Strathmore Mixed Media paper and colored with ZIG Clean Color Brush Pens. I love how bright these pens are. I also added some details using the clouds, flowers and mushrooms from the Slimline Meadows die set.  To create this shadow box style A2 sized card I cut out a window with the 4th smallest die from the Notched Squares nested dies set. Then I adhered my image behind the window using foam tape.  The sentiment is included with the  Gnome Gardeners   clear set. I stamped onto white Hammermill cardstock using Versafine Clair Nocturne ink and cut it out with the stitched oval die from the Quick Strip die set.   Whimsy products used: Thanks for stopping by today and I will be back soon with more inspiration! Hugs,

Hello Spring!

Image
Hi Everyone! Back again today with a colorful Slimline card featuring the NEW Spring Bird clear stamp set by Krista Hei-Barber from Whimsy Stamps.   To create my top-fold slimline card (3.5" x 8.5") I inked a panel of white cardstock with Distress Oxide inks that I wanted to use for my background. I used orange and yellow tones and kept the middle of the panel lighter for a glowing effect. Then I used the Farmhouse Greenery stencil with Versamark ink and heat embossed with clear embossing powder to add some texture. The images are stamped with Versafine Clair Nocturne ink onto Strathmore Mixed Media paper. I colored using Caran D'Ache Luminous pencils and fussy cut the images. A few clear confetti sequins and dew drops finish off my card. He re are the Whimsy products I've used: Thanks for stopping by today and I will be back soon with more inspiration! Hugs,

Black and White Slimline Card

Image
Happy Thursday Crafty Friends! I am going Black & White today. Here is a slimline card made using the NEW Slimline Papers Black and White Cat Prints together with the also NEW Slimline Pocket die . I wanted my whole card to be black and white so I also used a black slimline card base (3.75" x 8.5")  with the  NEW Slimline Papers Black and White Cat Prints . The cat image is from the previously released  Purre Love clear stamp set and was colored using ZIG brush pens.  I love all the little embellishment dies (buttons, little tag, stitches) that come with the Slimline Pocket die. The buttons I cut our from white glitter paper and the little tag I added to my large tag was cut from black cardstock.  The sentiments I used are both from the Purre Love set. To 'ground' the cat I added a layer of liquid fairy dust underneath the image. Here are the linked Whimsy products I've used: Thanks for stopping by today.  I have one more new release card to share tomorro

Magnolias - Whimsy New Release

Image
Hi Peeps! Another awesome release is available at the Whimsy store today. I love flowers and I love to create with flower images/dies/stencils and also draw flowers myself. So when I saw this new Magnolia die ....swoooooon! Endless posibilities! <3 Of course I had to use it right away for one of my release creations :-D  Here is what I came up with using the NEW Magnolia A2 die . I cut out the Magnolia background from kraft cardstock and layered it onto Arches watercolor paper. Then I colored the Magnolias pink using my Altenew watercolors and the background in a pearlescent white (Gansai Tambi).   I added a strip of vellum paper with the word Birthday stamped and embossed. To complete the sentiment I stamped the words happy and wishes onto black cardstock and heat embossed with white.  Here is  a closeup where you can see the shimmer from the white paint. It makes the magnolias really stand out and is such a nice contrast to the kraft color. For the flower centers I used golden

Live Laugh Love - Mixed Media Tag

Image
Hey Everyone & Happy Sunday! Welcome to my blog today where I would like to show you a mixed media tag I made using all Whimsy Stamps products. Whimsy has such a huge variety on stamps that make it easy to create in the mixed media style. My mixed media style is more on the cute side. I am not really a huge fan of the non-cute stamps and/or steampunk stamps.  One day I was browsing Pinterest and I saw a mixed media tag that inspired me to create something similar with just Whimsy products . Especially after the release of the Build a Fairy Garden die set.  Here is the link  to the tag where I got my inspiration from!  I started out with a white tag cut from mixed media paper. I then covered the tag with a layer of very light pink acrylic paint. I then added some texture with structure paste and stencils (brick and honeycomb - linked below). I added color with my Gelatos and a water brush and more texture and interest to the backgound with FADoodles clear stamps and Distress B