Showing posts with label Clearly Whimsy Stamps. Show all posts

September 14, 2022

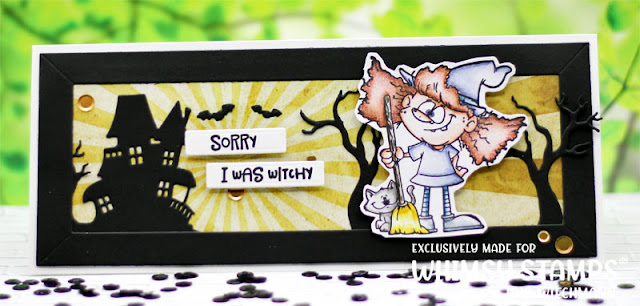
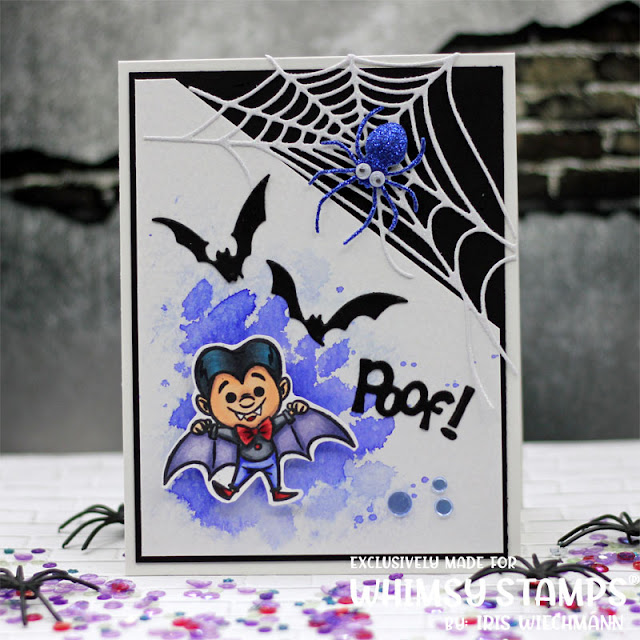
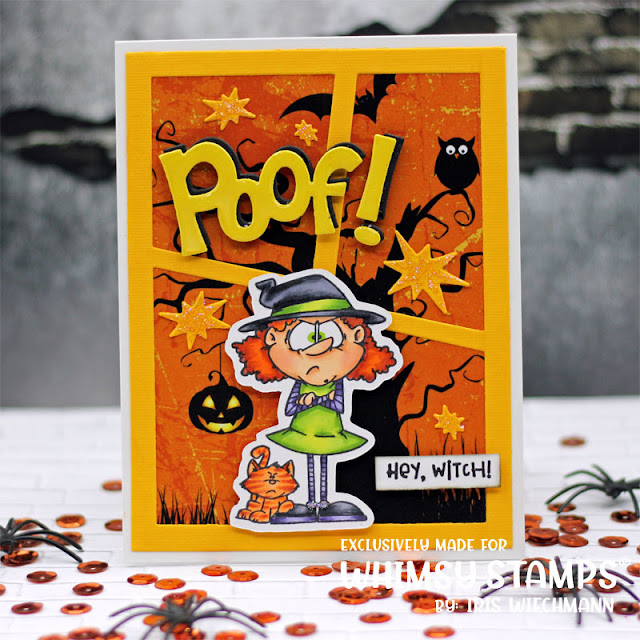
Witch Whispers - Whimsy's Newest Release

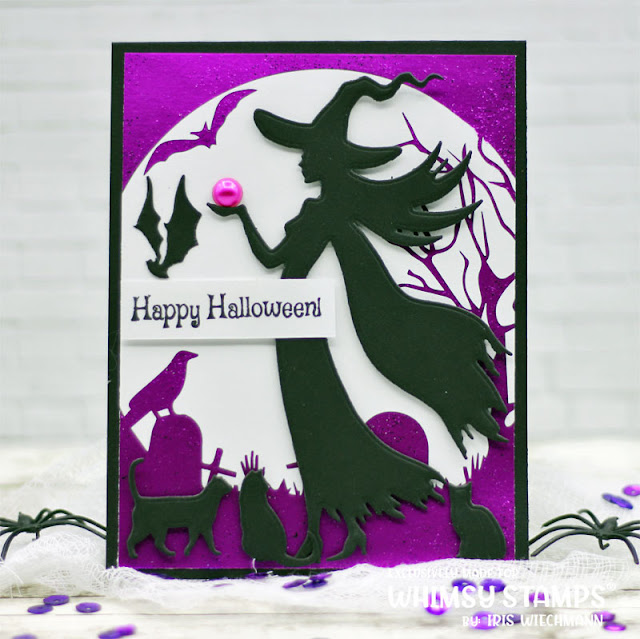
Happy Wednesday! A day late again with my posting. Looks like life is interfering again with my crafting time *sigh*. But now without further ado here is my first creation using products from the most recent Whimsy release. 


The New A2 Toner Terror papers are AMAZING!!! I am so in love! The background for my card was created using one of the designs in the pack together with a violet satin finish foil. I love the contrast of the violet foil and the black and white from the rest of the card. The die cuts are from the also NEW Witch Whisper die set. 

Whimsy products used:


Hugs,


September 10, 2022

Happy Hauntings

Happy Saturday! Here is some inspiration for a Halloween card using products from Whimsy Stamps released earlier this month. 


I die cut the Mini Slim Tree House die from black cardstock and adhered it to a panel gel press background from my stash. I die cut the ghosts from vellum paper and stamped the sentiment with gray ink. A very quick card with a great effect! Happy Hauntings!


Products from the Whimsy store:


Thanks so much for dropping in today!

Hugs,


September 4, 2022

BooBoo

Happy Weekend! A little break again from Halloween cards with todays inspiration - Sorry you have a BooBoo! 


I combined the super cute 'Rats You're Sick' clear stamp set by Dustin Pike with the Slimline Big BooBoo die set. I colored the image using Copics and made the band aid die cut into a shaker card.


Whimsy products used:


Hugs,


September 1, 2022

Whimsy September 1st Release - He Is Just A Poe Boy

Woohoo! The Whimsy September 1st release is here! There are some awesome spooky Halloween products in this release. I made a mixed media style card using some of the new products. When I first saw this stamp set it was literally screaming 'mixed media' to me. So how could I resist getting inky and digging my fingers in all these different mediums. Mixed media is just so releaxing and SOOOO much fun to do. If you have never tried it before give it a go. It really is not difficult at all. I always say you can never do something wrong with mixed media. No matter how it turns out it is always the way it is supposed to be ;-) 

Below is a detailed 'How-To' on how I created this card. Maybe I can inspire you to give it a try.


How-To:

My card base is a A2 portrait top-fold card in black. The second layer is a piece of violet cardstock cut a 1/4" smaller than my card base.

To create the background I stamped the NEW Slimline Spider Webs BG onto mixed media paper with Versafine Clair Nocturne ink and heat embossed with black embossing powder.
Then I inked the background using Distress Oxide inks and Whimsy Ink Blending Brushes.
Distress Oxide colors I used: Villainous Potion, Seedless Preserves, Carved Pumpkin, Squeezed Lemonade, Black Soot.
Because even after heat setting sometimes the Oxide Inks tend to rub off of mixed media paper I treated the inked mixed media panel with Distress Glaze. I used a foam applicator to apply the waxy Distress Glaze in a thin layer. With a piece of paper towel I gently wiped off any excess wax.
I love the distress glaze because it does not only make the Oxide Inks waterproof it also removes the milky haze of the Oxide Inks (which I usually love, depending on my project) and they look brighter and more radiant.


Next I stamped the images onto Tim Holtz plain tissue wrap. The reason why I am using tissue paper is that I want the background to show through on my images. I used my Versafine Clair Nocturne ink but I should have used StazOn ink. The Versafine Clair ink never dried completely and I ended up heat embossing the images. Which was not a problem at all but StazOn could have saved me some time and effort here. Then I fussy cut the images and set them aside for later use.

Next I created the frame using the NEW Drippy Frame die. I die cut the frame from Strathmore toned blue mixed media paper. The blue of this mixed media paper is a soft greyish blue tone. I then heat embossed the frame using Versamark ink and Distress Embossing Glaze Hickory Smoke. I embossed several times to achieve a thick enamel like layer on the frame. The hickory smoke embossing glaze over the toned blue cardstock gives a nice dark gray shade.


I cut my spider webs background to fit into the drippy frame but did not adhere the frame to the background yet. First I had to adhere my images onto the background panel. To do thisI I used a matte gel medium. In my case it was what I had on hand: Vicky Boutin Matte Acrylic Gel. With a flat brush I added a very thin layer of gel medium onto the background where I wanted to place my images. (thanks to our layer of Distress Glaze the background is waterproof and adding the gel medium is no problem.) The I added the images followed by another thin layer of gel medium. 

After everything was dry I adhered the drippy frame to the background using liquid glue and set it aside.

Now I had to color my white cheesecloth to accommodate the colors on my card. I decided to stick with the Distress Oxide line and used Oxide Sprays to add color. I used Carved Pumpkin, Seedless Preserves and Villainous Potion.
While the gauze was drying I stamped the sentiments onto white cardstock with black ink and cut them out. I inked them with Tea Dye Distress Ink and added Stickles Black Diamond for some bling and dimension. 

Now it's time to assemble the card. I adhered the frame panel with foam tape to the card front and then draped the gauze/cheesecloth around it using liquid glue to secure it. I adhered the smaller sentiment with foam tape and the larger tomb shaped one on top with a small metal clip.


I hope this was helpful and I could inspire you to make your own mixed media Halloween card! With all the Halloween goodies on the shelves in the Whimsy store it is almost irresistible.


Whimsy products used on my mixed media card:


Thanks so much for dropping in today!

Hugs,


August 31, 2022

Whoopsie!

Happy Hump-Day! Taking a break from all the Halloween creations lately I want to share this pop-art comic style card today.


I used the Oh Snap clear stamp and City Street BG from the recent release together with the previous released Comic Burst A2 die.

Whimsy products used:


Hugs,


August 30, 2022

Trick or Treat!

Hey All! This time a not so frightful Halloween card where I combined several Whimsy products. It's on the cute side and totally suitable for kids.


I used a black slimline horizontal top-fold card base. To create the background for my images I used the Wobbly Windows slimline die and the Taffy slimline papers. I colored the images from the Trick or Treat Kids clear stamp set with Derwent Graphitint pencils and a waterbrush. 


August 29, 2022

Cute Halloween Witch

Hey Witch - Happy Halloween! This cutie patootie witch is from one of the new clear stamps sets by Crissy. You can find them in the Whimsy store here.


I colored her with Derwent Inktense pencils and used my waterbrush. The background was created using Distress Oxide inks and water. 

Here are the Whimsy products used to create my card:


Hugs,


August 28, 2022

Sorry I Was Witchy

Hello Everyone! A slimline card at last! I know it's been a while since I last made one. When I saw this cute witch from Whimsy's Dustin Pike collection I knew instantly what to pair it with.


The background is made by using one of the Slimline SurReally Cool Halloween papers. I then die cut the frame from the Slimline Scenic Country Side die set and the Haunted Graveyard Border from black cardstock. The image from the So Witchy set was colored with Derwent Graphitint pencils. The sentiment (which is included with the stamp set) was stamped with black ink and then cut out using the Simple Sentiment Strips die set. A few golden confetti sequins from This Calls For Confetti finish off my card.


Link list for all Whimsy products used:


Hugs,


August 26, 2022

Little Vampire

Happy TGIF! Here is a little vampire who wants to say 'Hi'. He is from the Trick or Treat Kids stamp set by Krista. It's from Whimsy's newest release.


I colored this little guy with Copics and created the background using concentrated watercolors (Dr.Ph Martins). A few spooky elements complement my card. Below is a link list of all products used.


Have a good start into the weekend!

Hugs,


August 22, 2022

Mystical Wishes From a Little Dragon

Happy Monday Evening! Isn't this adorable little dragon just super cute? He is from Crissy's newest set called Wizard in Training and available in the store here.


I wanted to keep the card as simple as possible not add too many layers so I stamped directly on the card base. I colored the little dragon with Copics. I also added stars and the moon. These stamps are included in the set as well.
Just the dragon and stamped stars was a little too CAS for my taste after all so I added some die cut glitter clouds and stars. The smaller of the clouds was used to stamp my sentiment on. I used printable glitter paper so stamping on the glittery surface was not a problem.
This way it is still a CAS card but not as plain as a one layer card. Much more to my liking. A few little gems finish off my card. 


Whimsy products used:


Thanks for stopping by and have a good start into the week!


August 20, 2022

It looks a Lot Like Halloween - Whimsy August 20th New Release

Hey Peeps! I think there is a whiff of Fall in the air! Well at least here at Whimsy and the new release. Not so much where I live though. Here in Florida it is still in the 90's with a heat index over hundred **phew**. So it was real fun creating this card and thinking of Fall and cooler temperatures *wishfulthinking* The cute image I used for my card is from the So Witchy clear stamp set by Dustin Pike.

I colored her with Copics and then cut her out. To create the background I used the Wonky Window 3 die with orange cardstock and a sheet of the Haunted Papers. 
I die cut the word Poof from yellow and black cardstock and layered them together with black behind yellow for a shadow effect. I also die cut the little stars in orange and added them around the image.


To make the word Poof! pop even more I added 3D glaze. I also added some Stardust Stickles to the stars.


Whimsy products used:


Thanks for stopping by and come back tomorrow for more Halloween inspiration!


August 17, 2022

Snap! - There goes another year....

Hello there! More inspiration from Whimsy's newest Comic Collection release! 


I created the background using the NEW City Street BG stamp and stamped onto a sheet of designer paper. Images and sentiment are from the NEW Oh Snap! clear stamp set. 


Thanks for stopping by and see you soon!