Showing posts with label Tutorial. Show all posts

July 27, 2010

Card Box Tutorial

Hello everyone and thanks for stopping by my blog today. I was asked by a few people if I could show a  tutorial on how I make my little card boxes. It's my pleasure to do so but bare with me as I'm not very good explaining stuff and making tutorials...LOL! :-)
I make these little boxes especially for cards that have lots of layers or when I embellish with dimensional flowers. They wont fit in regular envelopes. These little boxes are very simple and easy to make and it doesn't take long nor needs it a lot of effort.

Ok gather your supplies, you'll need:

scissors
scoring board
bone folder
paper cutter
ruler
card stock
preferred adhesive/glue
DP and embellies to decorate box


This is the card I'll be making my card box for.  I made the card quite a while ago and due to the large flowers it doesn't fit in a regular envelope. My card measures 6.5" x 5.5". I need a box that is a little larger to fit my card easily as the bow and leaves are overlapping on one side a little.


So I go for 6 3/4" length and I also have to add 1" on each side which brings it to 8 3/4" length. For the width I go with 5 3/4 plus the 2", equals 7 3/4". So for my bottom box part (the one I'll put the card in) I have to cut my card stock 8 3/4" x 7 3/4". The top part has to be slightly bigger as it has to fit over the bottom part. The measurements for the top part are 9" x 8". I usually make my boxes about 1" high but if you want or need them higher just adjust them to the size you want. I almost always use white 110 lbs card stock for my boxes and decorate them with matching DP.


Score both sheets at 1" on each side....


.... and fold.


Now cut 2 little slits on opposite sides as shown in the picture. And it actually doesn't matter if you cut on the longer or shorter side. All the instructions are now for the top and bottom part of the box as they don't differ.


Bevel the corners (refer to the above picture) so they wont show after assembling the box.


On this picture you can see that the corners would most likely show slightly if I would not have trimmed them.
If  you like to decorate the box I suggest doing this before gluing it together because it's much easier. Also if you like to add e.g. a "handmade by" stamp on the bottom of the box do this before assembling!


Assemble the top and bottom part of the box using your preferred glue. I usually use a liquid glue from Scotch 3M called 'Quick Dry Adhesive'. I really like this glue as it doesn't wrinkle the paper (even if it is a liquid glue) has a good bond and it dries really really fast and clear.


And voilà, you're done with your card box! :-)

I kept my box quite simple just added matching DP, ribbon and a tag using my new 'Magnolia Doo Hickey Die'. The little circle sentiment is from Whimsy stamps.


This is how the card fits inside the box...perfect!


Thanks for visiting me here today and I would like to hear if you liked the tutorial and everything was perspicuously explained.

Have a great Tuesday and see ya tomorrow. I have a cute bookmark to show to you ;-)

Hugs,


June 8, 2010

Clean & Simple and a Shaker Card Tutorial


Hi everyone and thanks for hopping by here today. My card for today is another shaker card. Can you tell that I like them? LOL :-) I choose a clean and simple layout to make the shaker really stand out. I also did a mini-tutorial on how to make them on our Belles 'n Whistles blog. For the tutorial please click here. 

I used Tube Wear from Belles 'n Whistles Spring, Cleaning and Summertime Collection. The image was stamped onto cryogen white paper from Arjo Wiggins with Tuxedo Black ink from Memento. I colored using my Copics. As I said a chose a clean and simple layout with no DP's which was also inspired by a sketch/card from Suzanne. For decorations, besides the shaker pouch,  I only used a little glitter (holo glitter from Viva), 2 buttons and some tiny half pearls.


Hope you like my clean and simple card and let me know if you liked the tutorial as well!


Love and Hugs,

February 3, 2010

Mini Paper Basket & Tutorial


Hello everyone!  Today I like to show you a little paper gift basket I made. This is a real quick project and ideal for giving some sweets maybe at Valentines or together with another gift for a birthday or the like. Those baskets are not only for Easter where they are typically used I guess. I find them quite versatile. I filled mine with some small, single wrapped chocolate bars and it's going to be part of a birthday gift set. I chose the image Cupcake from our latest Belles 'n Whistles collection Sweet Things. I just loooove this image and think she is just perfect for my little sweet basket, don't you think so? For the colors I chose green, brown and yellow because I like to use some of the DP's from Basic Greys Origins collection for my card and gift wrapping later on. So my little basket will fit perfectly then.


 Here's a close up of the image. I colored her with my Copics.


 And here you can see I decorated the handle with some rhinestones.


I decorated the back side with a punched out heart.


I made a little tutorial for you on how to make these cute baskets. I thought maybe you'd like to know and you'll see they are really quick & easy to make.


Mini Paper Basket Tutorial

First cut 3 pieces of cardstock (different colors if you like) in following sizes:
1 square: 5.5 inch x 5.5 inch, 1strip: 1 inch x 8 inch, 1strip 1/2 inch x 8 inch
(picture below)


Next score the square on all four sides at 1 3/4 inches


 You can now round the corners using a corner rounder punch, if desired. Fold at the score lines.
Using scissors cut along the score lines of one side (but not all the way through
- see next two pictures) and repeat on opposite side.


Apply double sided tape or adhesive according to the picture.


 Push the middle flap back and overlap the outside flaps in a V-shape, adhere.
Do the same on the other side.


 You are almost done assembling your basket...I told you it's fast and easy ;-)
Your basket should now look like this:


Now on to the handle. Adhere the two strips on top of each other.
 

 Apply double sided tape or adhesive on both ends of the strip and attach to the inside of the basket.
  

 And 'Voila' your mini-basket is done! Now it's ready to be decorated, get creative!


I hope you liked my little tutorial and maybe you like to give it a try as well.

Thanks for visiting me today!

Hugs,

September 14, 2009

Triangle Box Tutorial


Hello Everyone! Today I have a little tutorial prepared for you on how to make triangle boxes. I really like these little boxes because they are quick and easy to make, different in shape and so versatile. You can make them in all kinds of sizes and for various occasions. And even if you need larger quantities they are still quick to make.


Ok onto the tutorial now :-)

You'll need:

Cardstock or designer paper of your choice
Whole punch
Ribbon
Pencil
Cutting and scoring tools
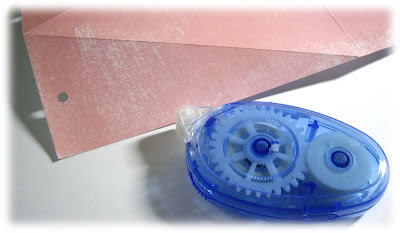
Glue or double sided tape
Eyelets and eyelet setter, if desired
Decorative items of your choice, if desired


Step 1


Cut the card stock or designer paper to 5 x 12 inches and score it in half at 6 inches.


Step 2


With a pencil mark the middle at 2.5 inches at both of the short sides.


Step 3


Now use your paper scorer and scor from the marked middle to one end of the
already scored line. Score a second line to the other end.


Step 4


Repeat with the other half. Now your paper should look like this with large triangles
in the middle of both sides.


Step 5


Now fold up all scored lines!


Step 6


Now fold up your box with one sides flaps over lapping the flaps of the other side.


Step 7


Take your whole punch and punch a whole (size depending on your eyelets, if you like to use eyelets) in the middle of one side. Punch through both layers (flaps) at once.
Repeat the same procedure on the other side.


Step 8


Now your piece should look like this with a whole in the middle of each flap.


Step 8


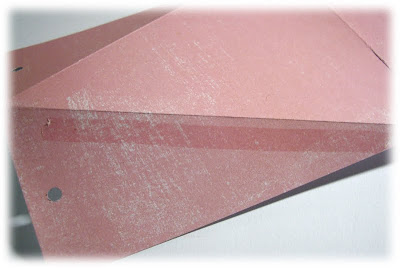
To give some more stability to the box glue one side together using glue or
double sided tape.


Step 9


Leave the other side open (not glued together).
Now set your eyelets, if desired. Remember to set the eyelet on one side
(the one which is not glued together) just in the outer flap!


Step 10


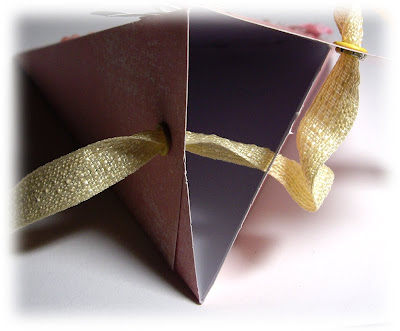
Thread the ribbon through the wholes to close the box.

Now your box is ready for being decorated!

Variation:

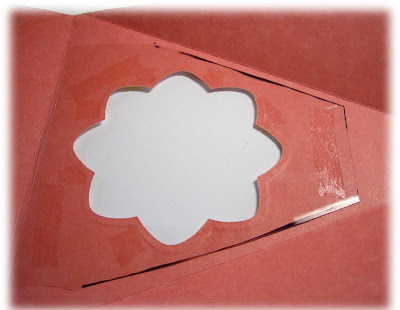
You can easily vary the size of your box for your needs. For some changes
why not make a box with a little window so you can show the contents
(like nicely wrapped candies etc.)


In one of the triangles cut out (die cut) a shape of your choice and...


... cover the window from the back with acetate.


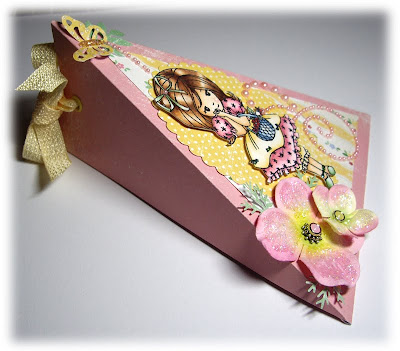
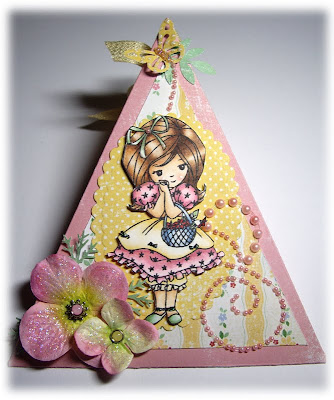
Ok and this is how I decorated my Triangle Box using the cute Lil' Miss Poppy stamp:


My box is part of a birthday gift set and I'm going to fill it with some yummy treats.
Isn't Lil' Miss Poppy just the sweetest congratulator?


I used Prima Flowers pimped with Stickles, Basic Grey brads and spacer beads as part of my decorations for the box


I hope you like my little tutorial.


Thanks for stopping by!

Hugs,