December 19, 2018

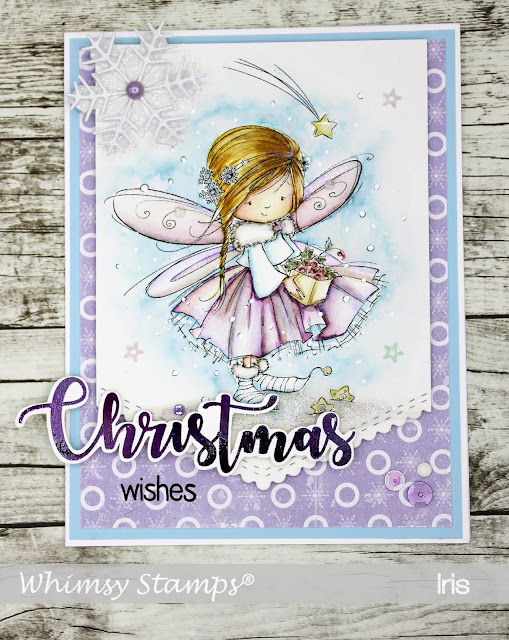
Fairy Christmas Wishes

Hello Everyone! My creation today shows one of the super cute Marina Fedotova fairies available at Whimsy Stamps in red rubber. She is called Anna the Fairy. This card was published in the Making Cards magazine November 2018 issue, including instructions on how to make this card, in which Whimsy Stamps had a special feature. 


I wont be sharing any details this time on how I made this card to not infringe with any of the magazines copyrights/rules. But I can tell you that I used distress markers to color this cutie as well as the sentiment is from the You're my Jolly sentiment set also available in the store. I also used different Whimsy dies available in the store. I have listed all Whimsy products I used below with direct links to the Whimsy store.


Whimsy products used:
You're My Jolly Clear Stamps    Anna the Fairy Rubber Cling Stamp   *NEW Envelope Edger Die Set    Snowflakes Dies

  Elegant Snowflakes Die Set    VersaFine CLAIR Ink Pad - Nocturne (black)      VersaMark Full-Size Ink Pad - Original (Clear) 

Clear Embossing Powder   Nuve - Deluxe Adhesive      Stickles Glitter Glue - Star Dust      Crafty Foam Tape White   Sparkletz - Sailor's Sky     Sequin Tin - Mixed Berry     Painted Garden Sequin Pack   


Thanks for stopping by!

Hugs,


December 12, 2018

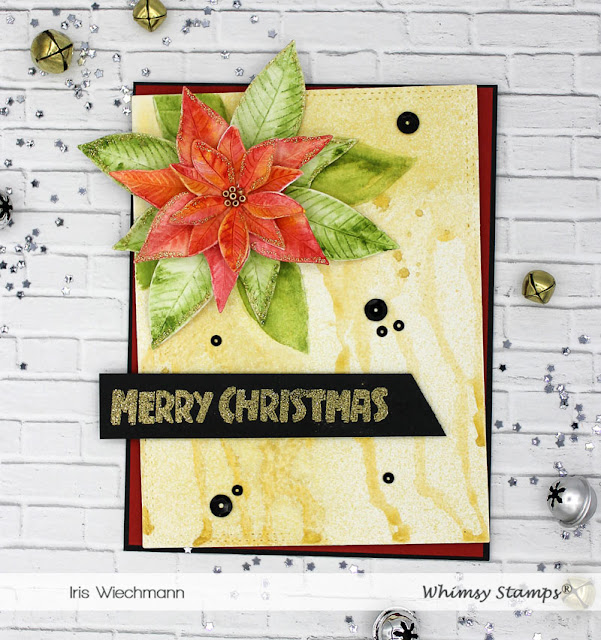
Watercolored & Die Cut Poinsettia Christmas Card

Hello everyone! It's been a while for me to post - wow over a month - but I took a break to be with family. Now that everyone is home again :-( I slowly get back on track.

The card I want to share today has a beautiful poinsettia as focal point. I die cut the flower with the Whimsy Build a Poinsettia die .


I die cut the poinsettia from watercolor paper and colored the pieces with watercolors before assembling. I also drew a few poinsettia leaves directly on the background panel. The golden shimmer background was made by adding gold glimmer spray to a slightly wet paper. I sprayed it on as well as added the gold glimmer liquid with the spray applicator directly to the paper for a more drastic effect.


The sentiment is from the The Nutcracker clear set. I stamped with Versamark ink onto black cardstock and heat embossed with gold embossing powder. For a finishing touch on the flower I've added a thin layer Nuvo Crystal Drops Gold Coast to some of the the poinsettia leaves as well as some seed beads as the flower center. Different size black sequins finish off this rather simple Christmas card.


Whimsy Products used:


Build a Poinsettia Die   The Nutcracker Clear Stamps     *NEW Card Builder Windows Die Set    Nuve - Deluxe Adhesive   Gold Embossing Powder  VersaMark Full-Size Ink Pad - Original (Clear)   Nuvo - Glitter Drops - Gold CoastHalloween Nights Bling Kit 

Thanks for stopping by!

Hugs,


November 5, 2018

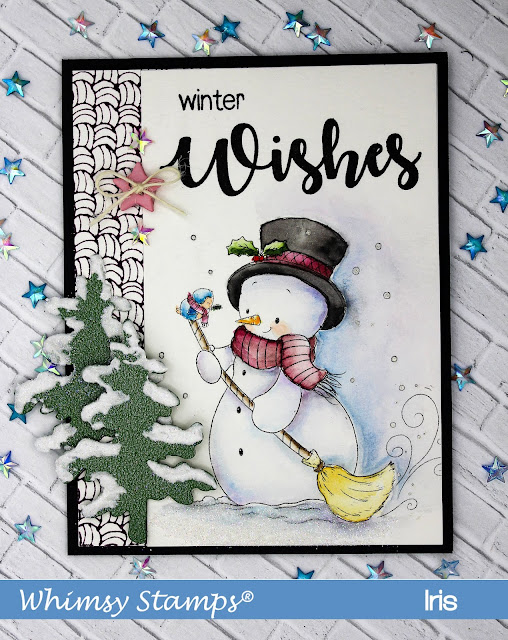
Whimsy Stamps New November Release - Snowman & Friend


Hello All! Today I have a creation to show which uses the NEW Snowman and Friend image by Lee Holland. 


This sweet image was colored using watercolors (Altenew water colors). I stamped onto Canson XL 140lbs watercolor paper with Versafine Clair Nocturne ink.. I almost always use the smoother backside of the paper to my stamping images on. The background panel on the left side was stamped with the NEW Cozy Blanket BG stamp and Seedless Preserves Distress Ink. The die cut trees are the NEW Snowy Trees Die Set. I've added Glitter Snow to the trees branches for an even more snowy effect. The sentiment is from the You're My Jolly sentiment set that was released last month. To embellish my card I used some Stickles Stardust Glitter Glue on the snow and added a button and two Sparkletz stars. 


Here are the products I used:


*NEW Snowman and Friend Rubber Cling Stamp   *NEW Cozy Blanket Background Rubber Cling Stamp   *NEW Snowy Trees Die Set      *NEW You're My Jolly Clear StampsDistress Ink Mini Pad - Seedless Preserves    Sparkletz - Crystal Stars  Nuve - Deluxe Adhesive

   Crafty Foam Tape White    VersaFine CLAIR Ink Pad - Nocturne (black)      Stickles Glitter Glue - Star Dust


Have fun creating and don't forget to show your Whimsy creations in out FB group

Thanks for stopping by today! 

Hugs,


October 28, 2018

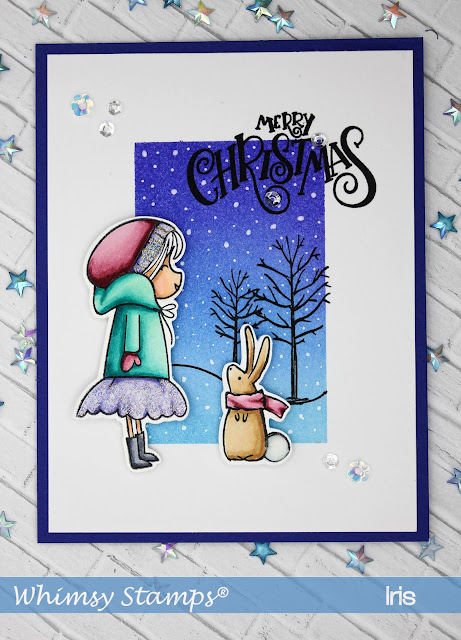
Bundled Up Christmas

Hello and Happy Sunday! What a gorgeous weekend here in Florida. Finally temperatures are down and it is a BEAUTIFUL fall day. Windows and doors open and cooler air is streaming in! I was waiting for that since April - lol. Don't get me wrong I love the Florida Summers but Fall and Winter in Florida are my most favorite seasons!

I have a cute little card to share today. It's a CAS design using the gorgeous  NEW Bundled Up clear set by Deb Davis - one of my favorite Whimsy Artists and fellow Floridian.


How to create this card:

1. Cut card base from ultramarine blue heavy weight (110lbs/300gsm) cardstock - 11" x 4 1/4", top fold card. Cut white card panel - 4" x 5 1/4" - from heavy weight mixed media paper (I used Strathmore Mixed Media 140lbs / 300gsm)

2. Stamp images from the Bundled Up clear set using Memento Tuxedo black ink onto Copic friendly cardstock (I used Hammermill 100lb Digital Cover Stock) Color the images using Copics and then fussy cut. Copic colors used: E000, E00, E11, Y11, R81, R83, R85. R89, BG18, BG13, BG11, C3, C5, E30, E31, E33, E35, BV000, BV00, BV01.

3. Creating the background: Using post-it tape mask a rectangle (2" x 3 1/4") in the center of the white mixed media paper panel. Gradually sponge the background with an ink blending tool going from dark to light where the darkest color is on top. Distress ink colors used: Blueprint Sketch, Wilted Violet, Salty Ocean, Mermaid Lagoon. With a black fine liner pen draw a line resembling a rolling hill. Stamp the trees and sentiment with Versafine Clair Nocturne ink (refer to the picture).
To add the falling snowflakes use a white gel pen (or what I prefer : Sharpie water based poster pen - extra fine point).

4. Finishing off the card:  Adhere the white background panel onto the card base using glue or tape. Add images with foam tape or foam circles for more dimension. To embellish the card add some clear/crystal sequins to the background layer as well as some Stickles Stardust to the girls dress and hat. For a finishing touch glue some white Fun Flock to the bunnies tail.


Whimsy products used:  


*NEW Bundled Up Clear Stamps     Nuve - Deluxe Adhesive      VersaFine CLAIR Ink Pad - Nocturne (black)                      
        Memento Full-Size Ink Pad - Tuxedo Black    Copic Sketch Markers Cadmium Red [Pack Of 3] (3PK-R27S)    Wonder Tape
  Crafty Foam Tape White    3D Foam Circles - WhiteInk Blending Tool   Distress Ink Mini Pad - Mermaid Lagoon      Distress Ink Mini Pad - Salty Ocean   Distress Ink Mini Pad - Wilted Violet   Stickles Glitter Glue - Star Dust Sequin Bag - Shine  


Have fun creating and don't forget to show your Whimsy creations in out FB group

Thanks for stopping by today! 

Hugs,

October 25, 2018

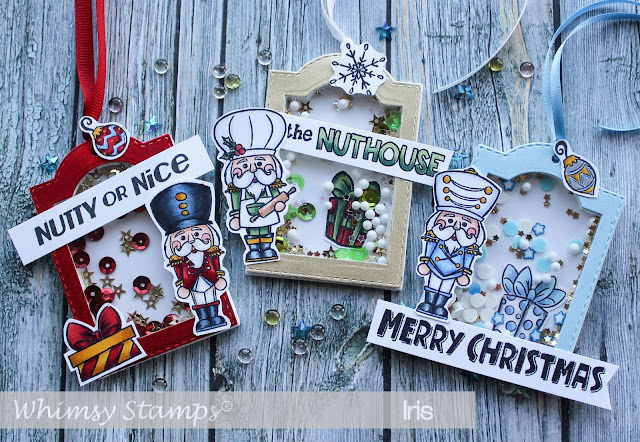
Nutty or Nice - Shaker Tags

Can you believe the holiday season is right around the corner? Jeeez where did the year go! My project today shows a set of three shaker tags created using the NEW Nutcracker clear set and the NEW Tombstone dies.


The images were colored with Copics and then hand cut. The red, blue and gold papers I used are left overs I had from an older Paper Door kit. I cut out the tags from cardstock using the Tombstone dies. I also cut out tags from fun foam being used as spacers, two per tag and layered them on top of each other between the cardstock cut outs. Just to make sure there's enough room for the fillings to move around freely. 

Here are the Whimsy products I used:


*NEW Tombstone Tag Die Set      *NEW The Nutcracker Clear Stamps    Nuve - Deluxe Adhesive      VersaFine CLAIR Ink Pad - Nocturne (black)   Memento Full-Size Ink Pad - Tuxedo Black    Copic Sketch Markers Cadmium Red [Pack Of 3] (3PK-R27S)    Crafty Foam Tape White   Shaker Fun Tin - Snowballs   Shaker Fun Jar - Confetti   


Thanks for stopping by today! 

Hugs,