October 4, 2018

Whimsy Stamps October Release Day 4 & Giveaway


Welcome to Day 4 of the Whimsy Stamps October Release! 


Can you believe it's October already??? Where did the year go.....and it's time for Christmas cards again. But that's a fun and easy chore with the super cute holiday images from Whimsy Stamps! Click here to go shopping if you haven't yet already.

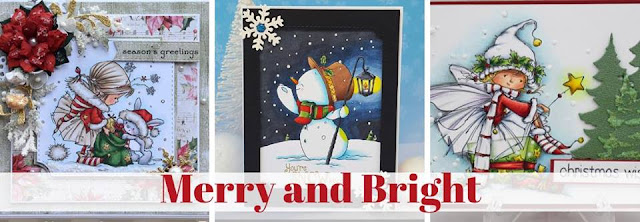
On my card today I am showcasing one of the newly released Marina Fedotova Christmas fairies - NEW Christmas Sprite.  Isn't she adorable? She is definitely one of my favorites from this release!


I colored Christmas Sprite primarily with Copics but added some details with pencils afterwards (a list of all Copics and pencils used is below). I kept the card simple. I didn't want to draw the attention away from this sweet image. Besides some snowflakes made with Nuvo Crystal Drops Simply White I only added 3 die cut evergreen trees. I thought they complement the image perfectly. They were die cut using the NEW Evergreen Tree Dies Set by Crissy Armstrong.  These trees are awesome and so super versatile. I love the style and that they do not have too many details which makes them perfect for CAS cards! This is a set of 4 different dies, to create 4 different tree shapes. The sentiment is from the NEW You're My Jolly sentiment set.


GIVEAWAY

*NEW Evergreen Trees Die Set


Because Denise from Whimsy Stamps is so very generous I have 1 (one) Evergreen Tree Die Set to give away. All you have to do for a chance to win is:

1. Leave a comment here on my blog telling me your favorite
Whimsy Christmas image from the October release :-)
You can see the whole release here:
Whimsy Stamps October Release

2. enter your name in the linky tool below. 

The giveaway is open until Sunday night 11:55pm. I will draw the winner on Monday and announce it here on my blog during the course of the day. So you make sure to come back here Monday and check if you are the winner ;-)


Here is a list of all the Copics and pencils I used to color my image:

Copics:
Skin E000, E00, E11, R02
Red: R21, R22, R24, R27, R29
Green YG61, YG63, YG67, YG21
Gold/Yellows: Y000, Y11, Y15, Y32, YG24
Wings: B41, V01, BV000
Outline/Shadows: B000, C1, C2, C4, C6, N0, N1, N3

Pencils (Faber Castell Polychromos)
White, Cream, Light Flesh, Light Cobalt Turquoise,
Light Phthalo Blue, Grey Green, Pine Green,
Light Red Violet, Burnt Ochre, Burnt Sienna,
Paynes Grey, Warm Grey V 


Whimsy products used:
a click on the image will take you to the product in the Whimsy store

*NEW Christmas Sprite Rubber Cling Stamp   *NEW You're My Jolly Clear Stamps   *NEW Evergreen Trees Die Set   Copic Sketch Markers Cadmium Red [Pack Of 3] (3PK-R27S)    Memento Full-Size Ink Pad - Tuxedo Black  Sparkletz - Crystal Stars   Nuve - Deluxe Adhesive  Crafty Foam Tape White     Nuvo - Crystal Drops - Simply White  


Thanks for stopping by

Hugs,

September 30, 2018

Happy 60. Birthday Card - Journey to Egypt

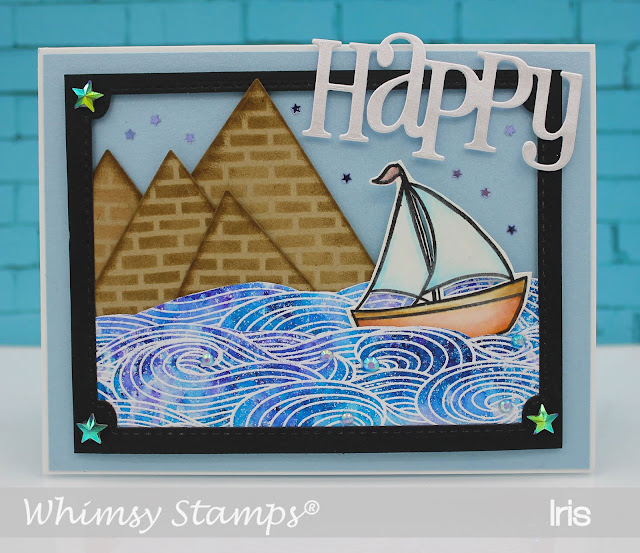
Hey Crafty Friends! Hope you are all enjoying your Sunday. I am here today with my last Whimsy creation for September. It's another request I had. Again for a birthday card, this time it's for someone who likes to travel to Egypt. Ok was quite a challenge because I do not have any Egypt related stamps in my stash. But I got creative and came up with this - all Whimsy products of course ;-)


I used the Shaker Maker Pennant Flag dies, the Brick Pattern Stencil and Distress Ink Brushed Corduroy to create the pyramids. The boat and the waves are are from the Splash clear stamp set. I created a back ground with Brusho (Ultramarine and Turquoise) and stamped the waves with Versamark ink on top and heat embossed with white embossing powder. The frame was made using the notched rectanlgle dies. I added some bling with Sparkletz Crystal Stars and Sparkletz Sailors Sky. 


On the insides is the rest of the sentiment:


Whimsy products used:

*NEW Shaker Maker Pennant Flags Die Set    *NEW Brick Pattern Stencil     Splash Clear Stamps    Happy Large Word Die        Nuve - Deluxe Adhesive      Crafty Foam Tape White    Copic Sketch Markers Cadmium Red [Pack Of 3] (3PK-R27S)     VersaMark Full-Size Ink Pad - Original (Clear)   White Embossing Powder    Memento Full-Size Ink Pad - Tuxedo Black    

Sparkletz - Sailor's Sky   Sparkletz - Crystal Stars   Distress Ink Mini Pad - Brushed Corduroy


Thanks for dropping in today! 

Hugs,


September 26, 2018

Soccer Themed Birthday Card

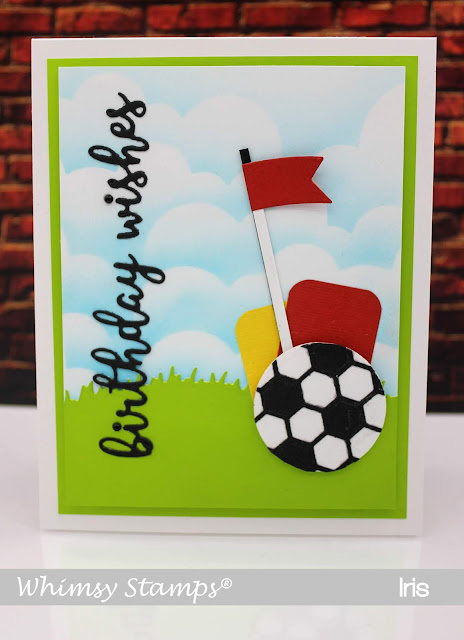
Hey Peeps! I had a request for a soccer themed birthday card. This is what I came up with using all Whimsy products.


I created the background using the Grass and Cloud Edger die set. For the sky I created a stencil with the cloud die and airbrushed the clouds with my Copic airbrush system. For the grass I used a super nice green cardstock I had left from an older PaperDoor kit. It is flat and almost looks like velvet but is silky smooth to the touch. I love this cardstock. I thought it's perfect for the grass and gives a bit of a fancy touch to this sporty card.

For the soccer ball I die cut a circle from white cardstock. Then I die cut the honeycomb pattern from black cardstock and also die cut a circle in the same size from the already die cut honeycomb pattern. I layered it on top of the white circle. I saved some of the small honeycomb cut outs and added them to the ball to create the special soccer ball look. The little flag was created with two thin stripes of white and black cardstock; layered on top of each other with the black one protruding on top. The red flag was made using an older banner die which is already retired. But you could use the Bold Banner Dies instead.

The red and yellow card are just cut to size from cardstock and I rounded the corners. The sentiment is die cut from black cardstock with the Birthday, Wishes and Magical die set.

The card base is a standard A2 size white cardstock and an additional layer of this awesome green fancy cardstock. I hope the recipient will like the card.

Whimsy products used:

*NEW Grass and Cloud Edger Die Set    Honeycomb Pattern Die   Bold Banners Dies   Word Die Set - Birthday Wishes and Magical   Nuve - Deluxe Adhesive Crafty Foam Tape White    Copic Sketch Markers Cadmium Red [Pack Of 3] (3PK-R27S)   


Thanks for visiting!

Hugs,


September 23, 2018

Halloween Treat Bag - September Paper Door

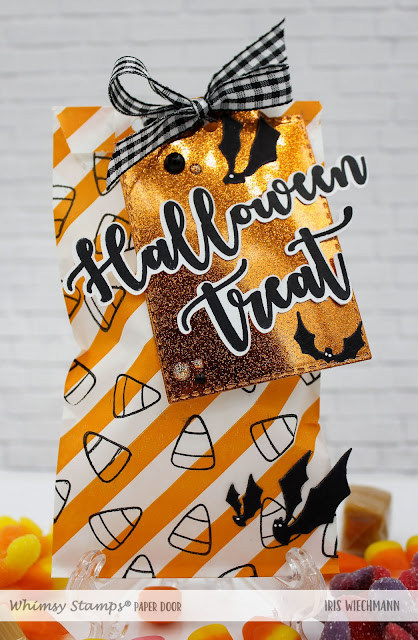
Happy Sunday All! Are you working on your Halloween Treat Bags already? I made another one with the Whimsy PaperDoor September kit.


I used one of the orange striped treat bags that came with the kit and stamped on some smaller candy corns in black. I filled it with candy and tied it up with the black and white gingham ribbon - also included in the kit. To decorate I die cut a tombstone using the tombstone die set from the kit as well as the shiny orange glitter cardstock. The sentiment is from the September release called You're My Boo. I stamped with black ink and fussy cut the two words. I glued them to the glitter tombstone together with some die cut bats.

Here are the links to the Paper Door Kit depending on your location - the postage is included in the price shown:


I want to mention that this is NOT a subscription. If you buy this box there are no strings attached. You will only buy this one box and no obligations to buy the next one! So feel free to buy with confidence and without pressure of a subscription.


Whimsy products used:

    Nuve - Deluxe Adhesive      VersaFine CLAIR Ink Pad - Nocturne (black)                      
*NEW You're My Boo Clear Stamps     Crafty Foam Tape White     Nuvo - Glitter Drops - White Blizzard     


Thanks for stopping by!

Hugs,


September 22, 2018

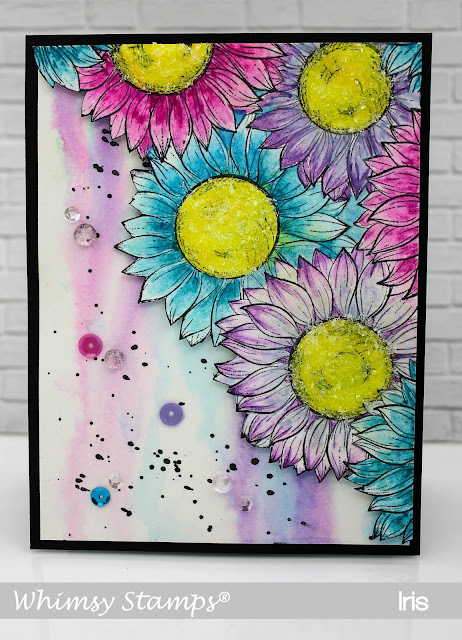
Delightful Daisies - watercolored


Hello Friends. Hope you are all enjoying your weekend. I have a card for you today I made using the Delightful Daisies Background Stamp from the September release again. I love this BG stamp so much. It is so versatile and can be used for much more than just as a background.

Last time I used Copics to color these beautiful daisies and today I used my Altenew watercolors.


The background is also made using the watercolors and I wanted it to look like the color is running off of the blossoms. It's not exactly how I wanted it to be but I hope you get the idea.
No sentiment on this card as I wanted to keep the focus on the pretty flowers and the colors.


Here is a closer look from the side. I also added some black sprinkles to the BG and put on some sequins and glass drops to embellish.


In this close-up you can see the German glass glitter I added to the flower centers. I wanted to give it some extra dimension.


Here are all the Whimsy store products I used :

*NEW Delightful Daisies Background Rubber Cling Stamp   VersaFine CLAIR Ink Pad - Nocturne (black)  Sequin Pack - Painted Garden    Sparkletz - Jelly FishSequin Tin - Mixed Berry    Nuve - Deluxe Adhesive  


Thanks for stopping by!

Hugs,