May 17, 2017

Whimsy Stamps May 2017 Rubber and Clear Release


Welcome Friends and Happy Wednesday! It's release time at Whimsy again! The new rubber and clear goodies are out as well as new dies! Click here to see the whole release in the store.

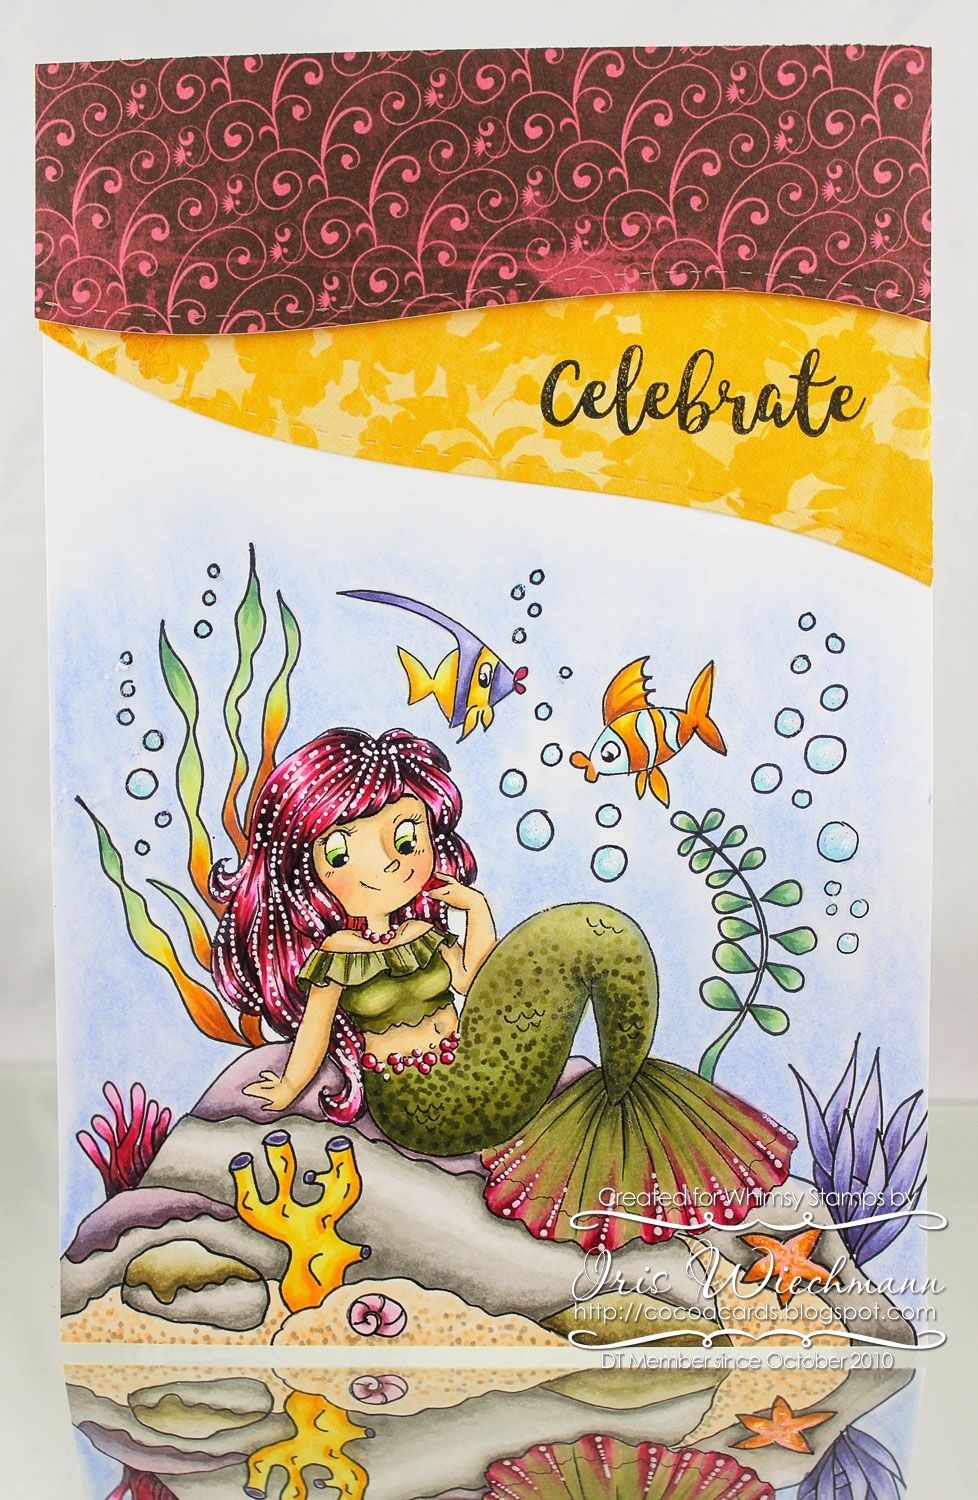
I have two cards to share with you today to celebrate the new release. Both cards are on the simpler side....here comes my first card...it features the new clear set Franken Schmutz by Deb Davis and the matching Franken Schmutz dies set.


I colored with Copics and the sentiment is included in the set. I stamped the background using the Distressed Background and Ink Splats clear set. The enamel dots are from the Summer Breeze Enamel Dots set.

My second card showcases the cute Can you belief this rain rubber stamp from Kirsten Winkelbauer.

This time I colored with Distress inks - Markers and Pads. Sentiment is from the Pretty Big Flowers set which was released in April. Unfortunately you can't see all the shimmer I added with my Wink of Stella clear pen and a clear sparkle gelly roll pen. It's so pretty, I like the sublte shimmer. The background is part from an older Bo Bunny paper pad and the other panel I made the background using distress inks and the smooching technique as well as the Distress spritzer tool and sprinkled with water.

Thanks for stopping by and don't forget to visit our Whimsy FB Group to see some stunning inspiration from my fellow teamies and to have the chance on winning some amazing prizes and celebrate the new release with us! 


May 5, 2017

Whimsy Stamps - Hoppy Days Special Promotion

Hello Everyone! Have you heard about Whimsy's May Madness Celebration? There are a lot of fun things going on this month! 

First the new Attitude of Gratitude campaign to express our appreciation for our awesome customers. When you visit the Whimsy Shop you will see a new tab on the top right side of the screen labeled Attitude of Gratitude. Here you will find Digital Freebies, CAS sets (coming soon), Publication Incentives, Special Promotions, and more. It's a space dedicated to giving back to our amazing customers. We hope you will pop over and check it out.


As part of the Whimsy Attitude of Gratitude campaign, this month we are offering this sassy ostrich digital stamp "Oswalda Goes Shopping," illustrated by Crissy Armstrong. She is FREE to all Whimsy customers and fans. You can find her on our Digital Freebies page along with a few others.
*************************************************
 Special Promotion - this weekend ONLY!
Here is a card I made with a very special Froggie stamp....


May 5th through May 7th - first 40 retail orders totaling $50 or more (excludes digital items, tax and shipping), will receive this adorable Hoppy Days stamp set FREE! This cute little frog was the very first Whimsy Stamps rubber stamp ever released. We have brought him out of retirement just for this special promotion. Click here for all the details.

Copic colors used on the Froggie image:
Froggie: YG03, YG21, YG93, YG95, YG97, YG99
Leaf: YG03, YG17, YG67, YG29 
Eyes: Y17, Y13, Y11
Water was done using a Clarity Stencils brush and the following Distress inks:
Tumbled Glass, Salty Ocean, Peacock Feathers


Hugs,


May 3, 2017

Fishy Birthday Wishes from Shark Shawn


Happy Wednesday! It's release time again at Whimsy Stamps - May Digital Release! All the new May images, papers and sentiments are available in the store now! 😀 Click HERE to see all new digital goodies! And as always it's instant gratification with digital stuff...no waiting time! Just download and start creating! Woohoo! 🙂

Here is a shaker card I made using the digital stamp Shark Shawn illustrated by no other than the fabulous Crissy and the digital Fish Sentiments set designed by our very talented Tracy.


I colored Shawn with my Copics. I then added the water using different blues of Memento ink pads - I applied them with my Clarity Brushes - to make his body appear to be partially under water. I love the soft effect it gives if you apply the ink with these brushes, much smoother than if you would sponge the background. My fellow DT sister Jeanette shows a how to on this technique in the latest Whimsy YouTube Video. You can watch it HERE. To add the glittery whitecaps I stippled with white Gesso and sprinkled it with white super fine glitter as long as it was still wet.
To create my shaker card I used the Shaker Builder Die set and to make the water appear in waves I used vellum paper  and cut it out with Stitched Border Die Trio and Pierced Border Die Trio. The balloon and hat are from the Sketched Elephants clear set and cut out with the matching Sketched Elephants dies. The fishy sentiment was cut out using the Sentiment Banner dies.
I added some bling with the glittery Winter Wishes Enamel Dots.

Don't forget to share your Whimsy creations in our Facebook group! We are looking forward seeing what you create!

Thanks for stopping by and I hope you like the new digital release!

Hugs,


April 30, 2017

Celebrate - Whimsy's Bunny Balloon


Happy Sunday All! I've been trying a new coloring medium - pastel pencils. I have the Faber Castell PIT Pastell Pencils. So far I've used my pastel pencils only for small backgrounds or outlines. To be honest I don't know if I like the medium to color images for greeting cards. What I love abut them is that you can blend them very easily, they are a charm to work with. Downside...You have to be careful with all the chalk dust from the pastels while coloring so you wont smear them over your art work and also the colors will rub off so easily. Which is bad for greeting cards. It's ok for a painting which you keep behind glass, but not cards which get handled a lot. This means you have to apply a fixation in some form. I've tried a fixating spray but did not like how my image turned out. The colors looked completely different after applying the spray. I ended up throwing it away and had to start all over again. One good thing though, if you make a mistake you can easily correct it using a good quality eraser. I was able to erase mistakes with ease.

Well I gave it a try and finished but this will probably be my first and last card colored with pastels.....too bad because the pencils are a dream to color with. After I got the hang of it I really enjoyed the coloring part...despite of all the chalk dust. Oh well I might give it another try in a little while 😉

The image is called Bunny Balloon and is from Whimsy's recent release. You'll find it HERE. I cut the word celebrate from light blue foil cardstock which I also used as layering cardstock. I doodled around the image and added some matching light blue rhinestones to finish my card.

Thanks for stopping by,


April 25, 2017

Happy Birthday Shaker Card - Whimsy DT


Happy Tuesday! After being on a little getaway over the Easter holidays I had no creation to share last week but I am back with a new card today.

Do you like shaker cards? I think they are so much fun and no matter if the recipient is little or grown-up I'm sure they will love them too!

Here I used the Shaker Builder Die set to cut out the frame for my shaker card.

The flowers are from the NEW Pretty Big Flowers clear set. I used my Misti to stamp the first layer on white card stock and the second outline layer on vellum. I stamped using Distress Oxide inks and in addition to stamping the outlines on vellum I also embossed them with clear embossing powder. If you heat emboss on vellum make sure to pre-heat your heating tool so your embossing powder melts faster, thus avoiding the vellum to warp from the heat. But still be careful not to over heat and damage the vellum. Then I layered the flowers together, adhered the layeres with glue dots and cut them out. I did the same with the leaves.
I was inspired by Jennifer McGuires video here where she demonstrated the vellum layering technique. The two twigs behind the yellow flower were stamped onto the background panel of the shaker card.
The happy birthday was cut out using the New word die sets Smiles, Happy and Celebrate and Birthday, Wishes and Magical. I embossed it with silver embossing powder and the dot on the i is a tiny silver pearl.

As filling for my shaker card I used different colored sequins - silver, white and pink. Some of the sequins are from the Valentines Sequin Assortment.

Thanks for visiting! 

Hugs,


April 14, 2017

Whimsy April Rubber & Clear Release - Day 3

Hello Everyone - Happy Friday! For Day 3 of the Whimsy April Release celebrations I have 2 creations to show. First is a little CAS card showcasing the super adorable "Mermaid Darling" by Kirsten Winkelbauer.

I colored her with my Copics (guess what....this time I wrote down the colors I've used...woohoo ;-) ). While I was coloring her I thought it would be nice to have some sorts of underwater background for her. So I doodled this little underwater scene. First with pencils and outlined it afterwards with Copic Multiliner Pens. I think it looks kind of cute with the image, what do you think?
For the water effect in the background I used a blue Pit Pastel Pencil (Faber Castell). It's hard to see in the photo but the bubbles have glitter (Stardust Stickles) on them.


Here is my list of Copics used:
Hair, Seaweed Tail: RV99, R39, R37, RV29, RV25, RV00
Mermaid Tail/Blouse: YG99, YG95, YG93, YG91, YG00, YG000
Skin: E50, E53, E43, R11
Fish, Coral, Seaweed: Y17, Y13, Y11 / BV00 BV02, BV04, BV08 /
YR27, YR15 Y17 Y13 Y11 / B00, B000 / G46, G43, G40
Rock: W00, W1, W3, W5 / V91, V93, V95, V99 / E89, E84, E81
Sand: E50, E51, E53, E43

My second card is CAS as well showcasing the gorgeous Cherry Blossom Panel die - *love*

The Cherry Blossom Panel was cut out from white heavy cardstock and layered onto a sponged background. I used Distress inks to sponge the background - Picked Raspberry, Spiced Marmalade, Mowed Lawn and Salty Ocean.. The word sentiment is from the New Pretty Big Flowers Clear Set.  I've added 3 Summer Breeze Enamel Dots to embellish the card.

Wishing all of you a Happy Easter!

Hugs,


April 13, 2017

Day 2 of the Whimsy April Release


Welcome to Day 2 of the Whimsy April Release! Today I have a CAS card to share. I made a Sympathy card using the Word Dies Set - Sympathy, Heartfelt and Condolences.


I also used an older die from the Hand Stitched Border die set. The dandelion stamp is from the Friendly Flowers clear set. It was released back in February. Only embellishment are three sequins and the black layer is actually black glitter cardstock which I think gives an elegant look to the card.


Thanks for dropping by and I'll be back tomorrow with two more creations!

Hugs,