April 20, 2023

Beep Beep - I think I miss you!

Hi friends! It's all about Robots with one of the the stamp sets I am showcasing today. It is release day at Whimsy Stamps and I had so much fun creating with the new products. Please read below about the products I've combined on my card and what I used to color my images. I was trying out two new coloring mediums I recently acquired.


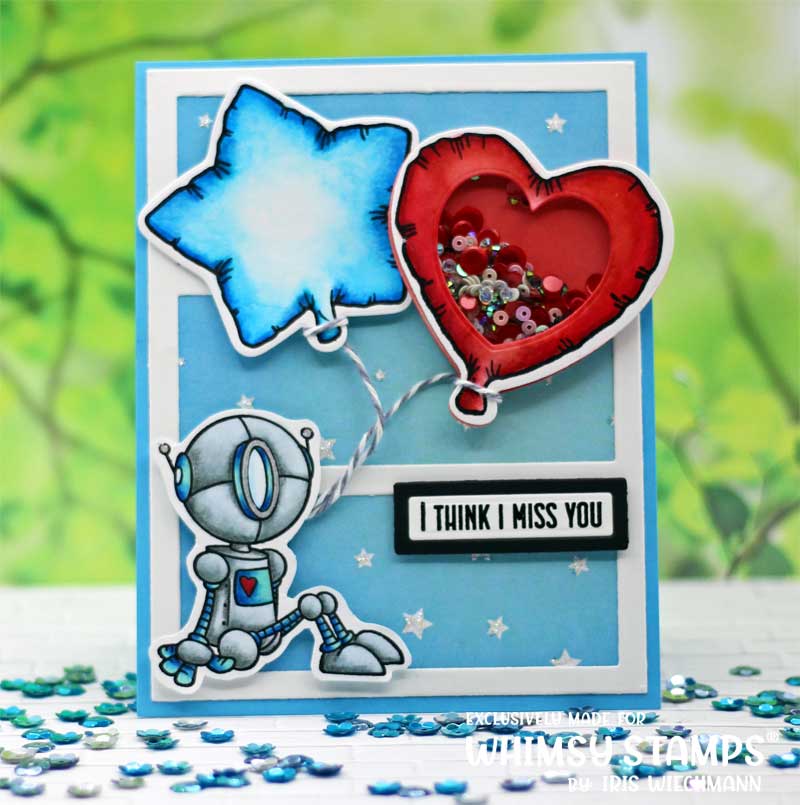
I combined three newly released products on my card today. First is this adorable sitting robot from the NEW Robots clear stamp set by Dustin Pike. The balloons and matching die cuts are from the NEW Celebrate Balloons clear stamp set and NEW Celebrate Balloons Outline die set. 
For the background I used the NEW Peekaboo Window 5 die and a sheet of the Comics 6x6 paper pack from an earlier release. The sentiment is included with the robots stamp set and I cut it out using the Simple Sentiment Strips die set. I also decided to turn one of the balloons into a shaker element and used the largest heart die from the Gothic die set.

For the shaker filling I used products from This Calls For Confetti

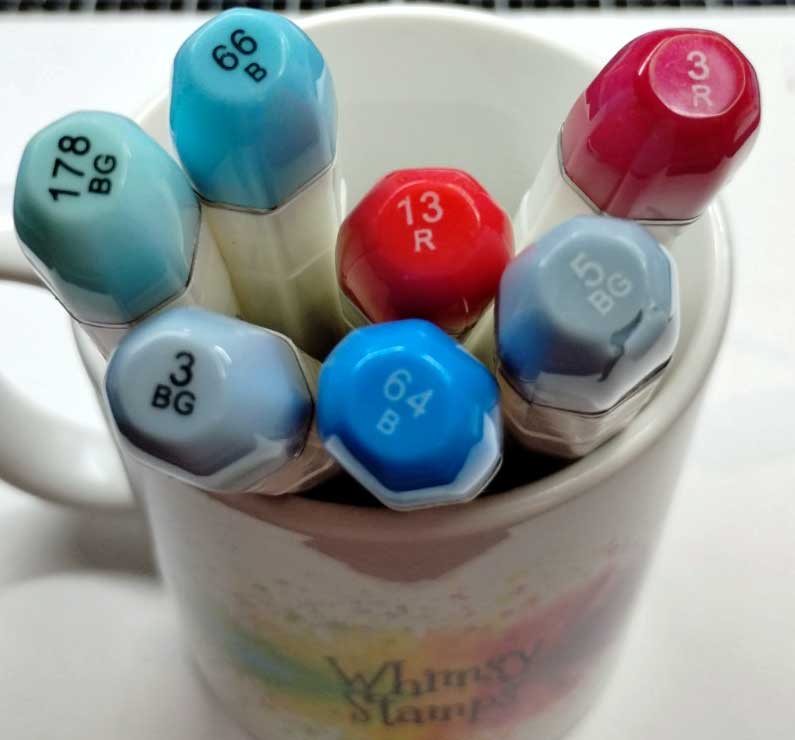
I recently splurged a bit and bought a few new markers. I bought the Art-n-Fly alcohol brush markers. They have a brush nib on one end and a chisel nib on the other. I bought several of their sets.


I also bought the Stabilo Pen 68 water based ink markers in their original version (full set, bullet nib) and brush version (full set).


Please note: I purchased these markers with my own money. My review about these markers is my honest opinion and was not in any way affect by a free sample!

Art-n-Fly:
  
The robot image was stamped onto Strathmore 400 series mixed media paper and colored with my Art-n-Fly alcohol markers. It's the first time I used these markers and I was pleasantly surprised. Their brush nib is not too soft and has a nice spring to it and it's beautiful to color with. The markers are very juicy and the inks blend wonderfully even on the mixed media paper. I did some research about these markers and what I was able to find out on the internet is (no guarantee though!) that the brush nibs and inks are from Japan - which usually stands for high quality. The markers are made in the US, another good thing, and they are refillable - yay! The company is still expanding the collection, which is good because there are still missing some colors in the color groups to give a nice blend. This is not a real problem for me as I can combine them easily with other alcohol markers I have. Price wise these are very affordable with about $1.70 if you buy a 48 marker set. The only thing for me to complain about at the moment is their numbering system. Doesn't make much sense. But once you make your own swatch chart this is not a problem anymore.


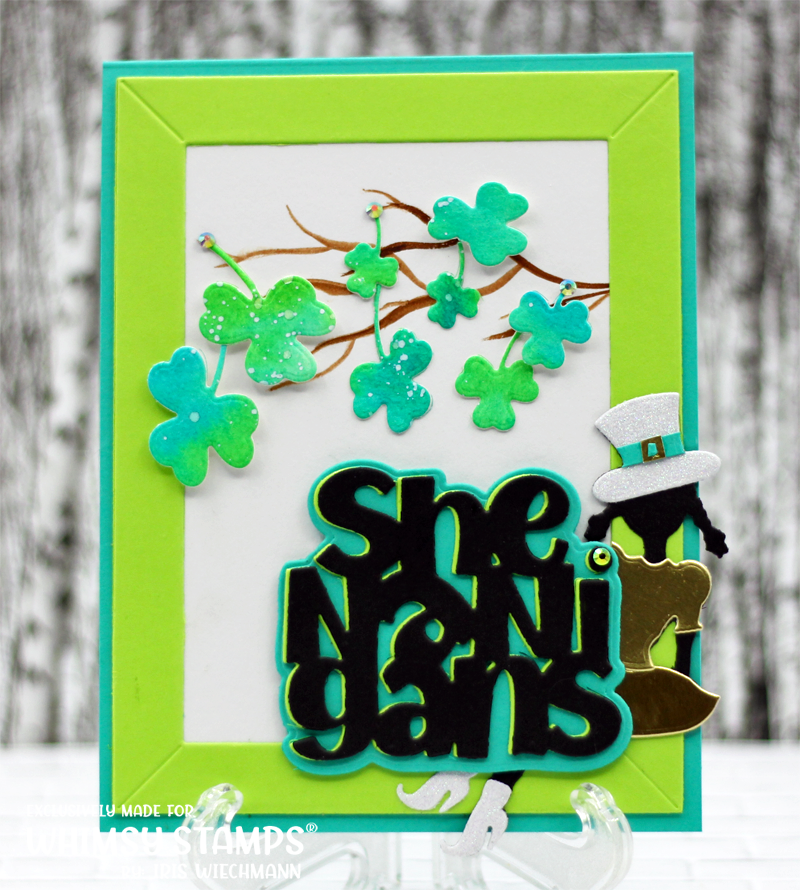
Stabilo Pen 68 Brush:

The ballons were also stamped onto mixed media paper and colored using my also new Stabilo Pen 68 Brush pens. These are waterbased markers.
I know Stabilo from Germany and the company is from the area where I grew up so we were using Stabilo markers and pens all the time. I never thought about using Stabilo pens and markers for my crafting. But I saw a youtube video recently where a fellow crafter used these pens (the regular Pen 68 not the brush version) to color an image. It was so beautiful and the colors were so bright and the pens appeared to be wonderfully juicy. It was tempting and knowing the brand and that they wont dry out easily even without cap on for a full hour.....what shall I say... I caved and bought the full sets of both versions. Whereas the brush version only comes in a 30 color set compared to the regular set (b)ullet nibs) with 65 colors. 
After coloring in the balloons I know now that I am not regretting to have bought these markers. They are fantastic. Super juicy with a very bright and radiant ink. I used a water brush to blend them out and they leave no marks and blend out completely. Even after blending out to white the colors are still vibrant.


Whimsy Stamps products used:


Here are the markers I used to color my images:

Art-n-Fly


Stabilo Pen 68 Brush


Hugs,


April 14, 2023

Look Who's Over 50!

Hello All! Two more samples showcasing the NEW Coverplate die Happy Birthday. On the first card I combined the new coverplate die with the NEW Ancient Days Club clear stamp set. I decided to make it a shaker card to add some dimension and bling. The NEW Coverplate Happy Birthday die is ideal for a shaker card or partial shaker card. So versatile, there are so many options with this die. 💕
I colored the images using Caran D'Ache Luminance pencils.


On my second card I die cut the Happy Birthday coverplate from dark blue glitter cardstock and adhered it on a gel press background from my stash. This makes for a really fast card. However the background and glitter die cut add enough interest and dimension to the card so that it doesn't look boring. 


Hugs,


Proud Female Veteran

Hello all! Today I am sharing another creation using new products from Whimsy's earlier release this month. With this release Whimsy is celebrating all military heroes and sheroes. 
You'll find all products HERE! on the Whimsy Stamps website.


Thanks for stopping by!

Hugs,


April 11, 2023

Koala Birthday

Hello Friends! Today I am sharing a card made with products from Whimsy's most recent release. 
You'll find all the new goodies HERE!

The NEW Happy Birthday Coverplate die makes creating a card really quick and easy. For the background I used a sheet of the previously released Bokeh 6x6 papers. Then I colored a few images from the NEW Koala Birthday clear stamps set using Ohuhu Alcohol markers, cut them out and added them to the front of the card. Some stickles glitter glue and a few sequins to add some bling. Voila - my card is done.  


Hugs,


April 1, 2023

You Are A SHERO!

Hi Everyone! My apologies for being MIA for over a month. Some personal things threw me off my path kept me from creating. But I am very happy to be back now and right in time for Whimsy Stamps April 1st release. 

With this release we celebrate all the heroes and especially the sheroes in the military and veterans as well. I have used several of the new products on my card. For a link list of all products used please scroll down. 


I used black and kraft cardstock together with the NEW Slimline Military Papers and NEW Military Sheroes Die Set to create the layers on my card. With the NEW Military Sheroes clear stamp set I added accents directly to the designer paper as well as kraft cardstock.
I love to incorporate earlier released products into my new release creations and this time the Military die set was perfect to finish off my card with some die cut embellishments - the tags and star.


Whimsy products used:


Hugs,


February 3, 2023

Shenanigans

Whimsy Stamps first release for February hit the store shelves 2 days ago. It is an awesome selection of stamps and dies with many of them St. Patrick's themed.


On my card I used the NEW Shenanigans Lassie die set, NEW Shenanigans Word & Shadow die set as well as the previously released  3in1 Mitered Frames die. 
I die cut the shamrocks from a piece of cardstock which I had watercolored with green and blue tones to match my card base and frame. The branch was hand painted using watercolors as well.  
I die cut the word shenanigans from black cardstock with matching colors for the shadows. I put the die cut lassie partly behind the word. Her dress is cut from shiny gold cardstock and her hat and shoes are sparkling white.


Whimsy products used:


Hugs,


January 13, 2023

Slurp!


Hello Everyone!
The card I am sharing today is made with several products from Whimsy's newest release. I made a slimline card and in addition to the new products used I've also used an earlier released embossing folder. My image was colored using Copic markers. Please see my link list below for all products used.


Whimsy products used to create my card:


Hugs,


January 9, 2023

Love Card - Quick & Easy!

Hello crafty friends! On my card today I am using two of the Whimsy products released earlier this month. SurReally Cool Sweatheart slimline papers and the Love Heart die.


I love when you can create a card with just two products. The NEW slimline SurReally Cool Sweetheart paper pack makes it really easy. These backgrounds do not need a lot of embellishing. With just an image or a die cut you can create fabulous cards in no-time.
My base is an A2 sized horizontal top-fold card base in hot pink. The next layer is cut from white glitter paper and a perfect mount for my designer paper background. The Love Heart is also cut from white glitter paper. I used a glue pen to add adhesive to the back of the heart. A few matching pink sequins finish off my card. 


Hugs,


January 3, 2023

SurReally Love My Space Moonie

Happy New Year! I hope everyone had a wonderful holiday time and wishing you all a very happy, healthy, peaceful, and joyful 2023.

I know you haven't seen anything new from me since earlier in December. Sorry for being MIA again. Life interfered again with my crafting time. My family needed my undivided attention due to some cases of illness. Unfortunately some of them very serious. So December was quite stressful and exhausting for us. But we are strong and we will pull through. 

I still have some cards to share from December and I will do so and post them throughout the month of January.

For today I have a NEW project - a slimline card - to share which I made with products from the January 1st release. All the new products are available in the Whimsy store HERE


I used the NEW awesome SurReally Cool Sweatheart slimline papers to create the background for my slimline card. These designer papers are fantastic and provide a perfect backdrop for your cards.
I then used the Space Moonies clear stamp set and outline dies to add details to my card. 
I stamped some constellations directly onto the background paper with Versamark ink and heat embossed with silver embossing powder. The heart moon and the space moonies couple were stamped onto Hammermill 80lb paper and colored with Copics. I then cut them out using the matching outline dies and adhered them to my card front with foam squares. The sentiment - which is included with the stamp set - was stamped onto white cardstock and cut out using a die from the Quick Strip die set. Some added Stardust Stickles here and there finish off my card.


Hugs,