October 28, 2020

Slimline Christmas Penguins

Happy Wednesday!

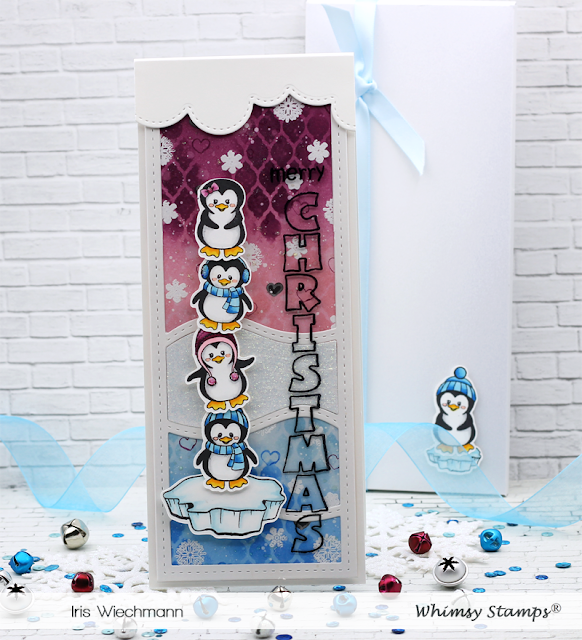
This is the card I was teaching to make at the Whimsy Stamps Virtual Weekend. It is a slimline card with an acetate overlay and an easy mixed media background.

I will not be going into detail on how I created my card because this stays exclusive to the members of the virtual weekend event. But I will be listing all products used at the end of the post.


Here you can see the acetate overlay with the stamped sentiment and the images added. On top of the mixed media background I used a slimline frame to add even more detail and texture.


The inside if the card is decorated to match the outside.


To make it a complete set I've added a bonus project to my class. I've created a template on how to create this matching slimline envelope that would fit our slightly thicker slimline card perfectly. I used white/gold shimmer paper to make the envelope and decorated it with matching images and a blue satin ribbon.

Here are all the Whimsy products I've used:

    
  *NEW Formal Lattice Stencil   

  Grass and Cloud Edger Die Set     *NEW Slimline Waves Die   


Thanks for visiting today!

Hugs,


October 25, 2020

Whimsy Stamps 31 Nights of Halloween Blog Celebration - Night 25

Good Evening Friends - Welcome to my blog and my frightful post for our 31 Nights of Halloween Celebrations over on the Whimsy Blog! 


There are LOTS of boo-tiful prizes to win. Please click the banner above to enter the giveaway!


Now onto my spooky birthday card I've created especially for this frightfully fun event:

I am using some older and newer products on my card but the main focus is on 'Dracula I compel you' together with 'Dracula's Coffin' die set. For the background I cut out a window from a 4" x 5 1/4" white cardstock panel using the 'Wavy Stitched Squares' die set. Then I added a piece of designer paper from the 'Vampire' 6x6 paper pack. I adhered this panel to a red 4 1/4" x 5 1/2" card base.


I stamped the Dracula image with Versafine Clair ink onto mixed media paper, colored it using my Karin markers and fussy cut it. Then I die cut the tombstones from the  'Dracula's Coffin' die set from scrap pieces of the same Vampire 6x6 paper pack. The trees are die cut from black glitter paper using the 'Tree Assortment' dies. The bats are created with dies from both the 'Dracula I compel you' and
'Dracula's Coffin' die set and cut from black cardstock. The scull was die cut from white cardstock and slightly inked with Antique Linen  Distress ink. The sentiment is included with the 'Dracula I compel you' clear stamp set. The RIP sign is from the 'Build-A-Graveyard' die set. 
I arranged my items the way I wanted them on my background panel and then adhered them with liquid glue and foam tape/squares. At last I added tiny red rhinestones to Dracula's eyes and also eyes to some of the bats with a white gel pen. 


I wanted the inside to have a matching sentiment too and stamped with Versafine Clair Nocturn ink and embellished with a few stamped bats. All stamps I used on the inside are included with the 'Dracula I compel you' clear stamp set as well.


All Whimsy products I've used to create my project are listed and linked below. 


    3D Foam Squares - White   
 
Nuve - Deluxe Adhesive     Karin Brushmarker Pro - Cool Aqua 204 - Whimsy Stamps


Thank you for visiting us today and don't forget to enter our spooktacular giveaway!

Wishing you all a safe and healthy Halloween season!

Hugs,


October 24, 2020

Sunflower Thanks

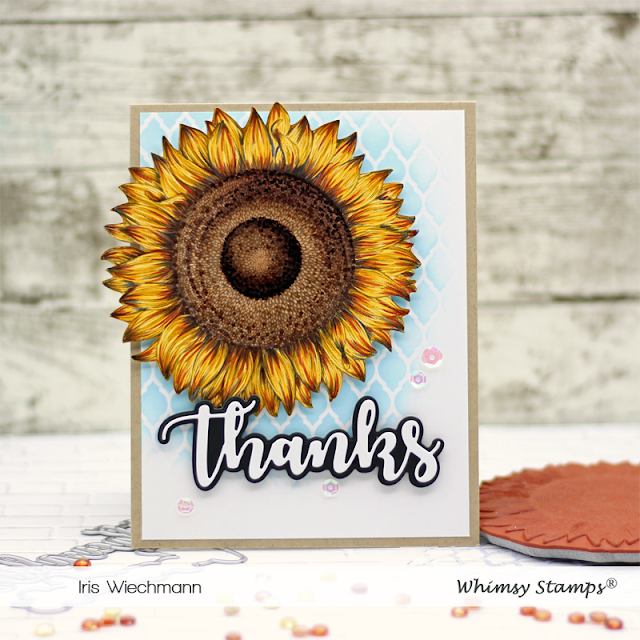
Happy Weekend! This Sunflower thank you card was one of the cards I made for the Whimsy Virtual Weekend Retreat last week. I love to make flower cards and this gorgeous sunflower stamp from Whimsy Stamps is one of my favorites. 

The sunflower was colored with Copics, fussy cut and put on a stenciled background. The word thanks was die cut from black & white cardstock using the Thanks large word and shadow die. 


Here is a link list of all Whimsy products used:
 
 
        **NEW Sunflower Background Rubber Cling Stamp - Whimsy Stamps    *NEW Formal Lattice Stencil   *NEW Thanks Word and Shadow Die Set 

3D Foam Squares - White    Nuve - Deluxe Adhesive   


Thanks for visiting today!

Hugs,


October 20, 2020

Everyone Needs A Crazy Friend

Hello Everyone & Welcome to my blog today! It's time for another Whimsy Mini Release!

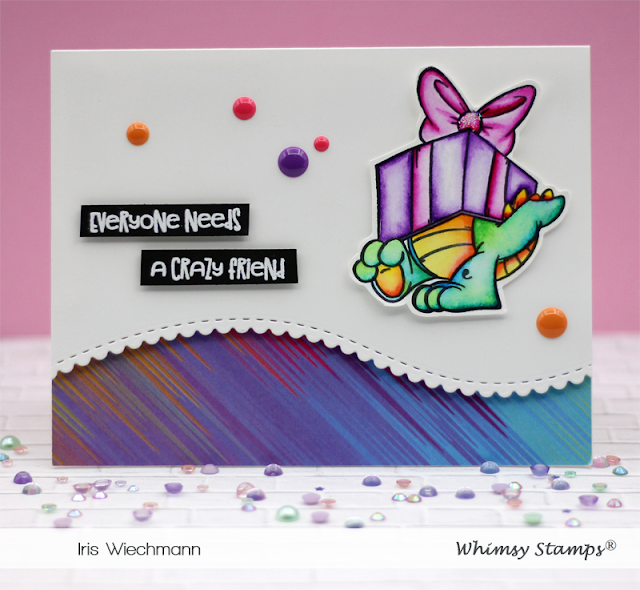
I am showcasing one of the super cute Dragons from the Dragon Christmas Cheer set by Dustin Pike.
This time I colored with Dr. Ph. Martins Radiant Concentrated Water Colors. I absolutely love the vibrancy of these colors. I stamped on Strathmore Bristol smooth paper with Versafine Onyx ink and used a water brush to color.


The sentiment, which is included with the stamp set, was stamped onto black cardstock with Versamark ink and then white heat embossed. The designer paper is from Whimsy's Cosmic paper pack (currently not available, I'm sorry) and the scalloped border was die cut with the Wavy Edgers die set.

I was getting some requests lately to list the colors I use for coloring, no matter what coloring medium.
Sometimes I just forget....sorry guys. Here is a list of the water colors I've used this time:

Dr. Ph. Martins Concentrated Radiant Water Colors:

Lemon Yellow
Persimmon
Scarlet
Moss Rose
Violet
Grass Green
Turquoise Blue

Whimsy products used:

   3D Foam Squares - White   

Nuve - Deluxe Adhesive   


Stay healthy and thanks for your visit today.

Hugs,


October 10, 2020

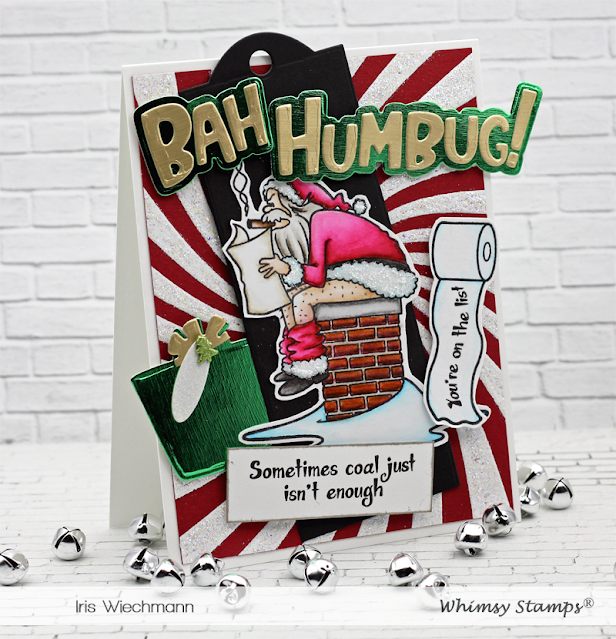
Whimsy Stamps 2nd October Mini Release - Bah Humbug!

It's time for Whimsy's second October mini release! On my card I use several of the new stamps and dies released today. Please find the product link list at the end of the post!

How funny is this Santa sitting on the Chimney doing his business....LOL Well someone is getting a huge surprise on Christmas morning...HAHAHAHA...that's when coal isn't enough....when you were super naught...LOL I hope you are not on that list!

Please note: The NEW Loads of Cheer clear stamp set sold out in record time. There are many more on the way and you can pre-order to reserve your set!  Shipping is anticipated in about a week!

How I created this card:
It is a A2 size, top-fold card from white cardstock.
For the background I used the NEW Cosmic Swirl background stamp. I stamped with Versamark ink onto red cardstock and heat embossed with white embossing powder to achieve a peppermint candy look. I then added Stardust Stickles to the white swirls to make them really stand out with bling. The background panel measures 4" x 5 1/4".
Then I die cut the large bookmark from the NEW Bookmark and Tags die set from black cardstock. From shiny green and golden cardstock I die cut the Bah Humbug! Word and Shadow set as well as the little gift tag from the NEW Bookmark and Tags die set
The Santa image is from the NEW Loads of Cheer clear stamp set and I stamped onto Bristol smooth paper with Versafine Clair Nocturne ink. I used my Kuretake ZIG Clean Color Real Brush pens to color the image and fussy cut it after I was done coloring. I also stamped the roll of toilet paper and the sentiments on white cardstock. 
I arranged the background panel, die cuts, image and sentiments on my card base and adhered them with glue and foam tape.


 3D Foam Squares - White   Nuve - Deluxe Adhesive 


Stay healthy and thanks for your visit today.

Hugs,


October 2, 2020

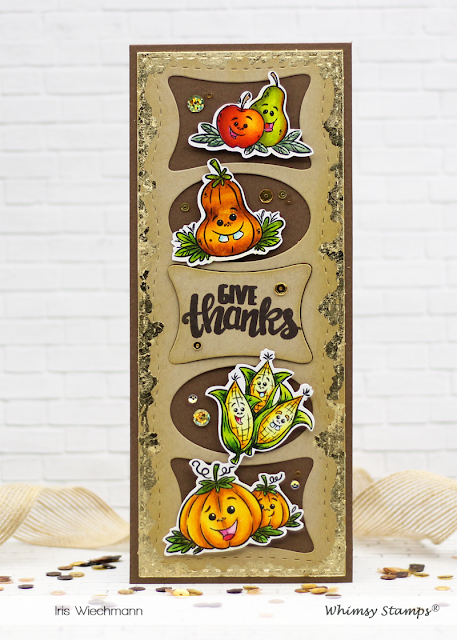
Whimsy October Mini Release - Give Thanks

Happy October Everyone! Wow I can't believe Fall is here and we are starting into the last third of this crazy year! Here's hoping for a better and normal 2021!

Whimsy just released (yesterday) it's first October mini release and the new products are all fabulous! Here is a slimline card I made using one of Krista's new stamp sets called 'Thanksgiving Cornucopia' (all products linked below). This time I colored using my Kuretake Zig Brush Pens. I stamped onto Bristol Smooth cardstock with Versafine Onyx Black ink. I fussy cut the images after coloring.

I used the Slimline Pillows die and die cut the frame from kraft cardstock. I then inked around the edges using Delicata Golden Glitz ink. I wanted to give it a nice golden shine around the edge but honestly I did not like how it turned out. It was way to dull and the gold ink was not showing much on the kraft cardstock. So I thought about what else I could do in addition to the gold ink. 
I thought of my gilding flakes and that I haven't used them in ages. So I gave it a try and used a glue pen to draw an uneven free hand border around my slimline frame. I let the glue dry until it was still sticky. Then I applied my gilding flakes and rubbed/burnished it with my fingers. Which worked quite well. 

This time I liked the outcome very much! I had a nice and shiny golden border which I think goes very well with the theme and my images as you can see in the close-up here. :-) 
The card base is a top fold slimline card made from dark brown heavy 110lb cardstock. I glued the Slimline Pillows die cut frame to the cardbase. 
I used one of the sentiments included in the stamp set and stamped with Versafine Clair Pinecone ink onto one of the rectangular pillow cut outs. I arranged my fussy cut images onto the card front and added the sentiment to the middle cut out. I adhered the images with foam dots and added some golden sequins to finish off my card.


  Whimsy products used:


3D Foam Squares - White   Nuve - Deluxe Adhesive   Karin Brushmarker Pro - Cool Aqua 204 - Whimsy Stamps


Thanks for your visit today.

Hugs,