November 30, 2019

More no-lines Water Coloring - Rose Birthday Wishes

Happy Saturday! Today I want to share my class project from the Whimsy Workshop Weekend in October. I was teaching a no-lines watercolor technique using Daniel Smith Watercolors and the beautiful Winter Roses Background stamp from Whimsy Stamps.

But before I do so I want to let you all know that Whimsy Stamps is having an awesome sale going on for Cyber Monday! Click the badge to get to the digital section in the Whimsy store!


So and here is now my no-lines rose card:

I love these roses! They are super versatile and can be used for so many occasions. A couple weeks ago I shared a card using these roses where I used the same no-lines technique but for a Christmas card. Check it out here. 


I used pink, purple and red for the roses and two different greens for the leaves and background. The no-line watercolor technique makes these roses look so natural and life like.


To give all the attention to the image and water coloring I kept the card very simple. I stamped the sentiment on the image layer and added only a few sequins for some bling.


Here are links to all the Whimsy products I've used:

*NEW Winter Roses Background Rubber Cling Stamp   You're My Jolly Clear Stamps   Nuve - Deluxe Adhesive   
VersaFine CLAIR Ink Pad - Nocturne (black)    Crafty Foam Tape White   Distress Ink - Mini Ink Pad Kit 3   
Sequin Pack - Morning Glow   Ranger® Artist Brushes Set


Thanks for stopping by! I'll be back tomorrow with my new release creation for Whimsy's December release! Make sure to come back tomorrow. I can tell you this much....the December release is YUMMY and you don't want to miss it!!! 

Hugs,


November 23, 2019

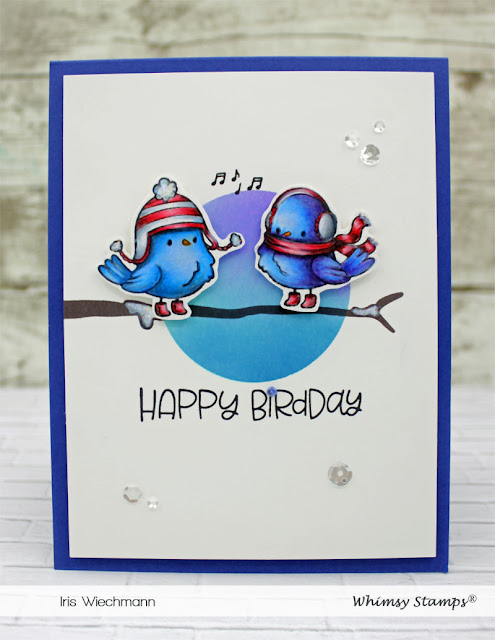
Happy BirdDay!

Happy Saturday! Here is a cute little birdie birthday card I made recently. The image is from the adorable Tweetie Pie clear stamp set from Whimsy Stamps.

I colored the cute birdies with pencils (Polychromos, Prismas and Luminance) and fussy cut them. For the background I cut out a circle from a piece of masking paper and inked the circle with Distress Inks (tumbled glass, wilted violet, blueprint sketch) on a white piece of cardstock.


I then stamped the branch with Versafine Clair Pinecone ink. The sentiment and the music notes were stamped with Versafine Clair Nocturne ink. Using foam tape I adhered the birds to the background panel and layered it on to a blue cardbase.  I added Stickles Stardust to the snow on the branch as well as to the birds hat and scarf. A few clear sequins and a blue seed bead finish off my card.


Here is a link list of Whimsy products used:

*NEW Tweetie Pie Clear Stamps    Nuve - Deluxe Adhesive   VersaFine CLAIR Ink Pad - Nocturne (black) 

Crafty Foam Tape White   Stickles Glitter Glue - Star Dust   Sparkletz - Baby Boy   Sequin Pack - Morning Glow


Thanks for stopping by! I'll be back soon with more inspiration projects from Whimsy Stamps!
So stay tuned! Have a nice weekend.

Hugs,


November 14, 2019

No-Line Watercolor - Winter Roses

Hello Everyone, I am sharing a card today where I used the no-lines watercolor technique to color these beautiful roses from the Winter Roses Background rubber stamp.

I stamped the image with Antique Linen Distress Ink onto cold press watercolor paper. The light color of the Antique Linen ink will blend into the watercolors while coloring for a no-lines effect. To color the roses I used Daniel Smith extra fine watercolors. To create the background I used the Farmhouse Basket stencil and Shabby Shutters Distress Ink.


The sentiment is from the You're My Jolly sentiment set and was stamped with Versafine Clair Nocturne ink. To create more texture and for an artsy look I've added pink and green watercolor splatters as well as white acrylic paint splatters. A few clear dew drops finish off my card. 


Here is a link list for all the products I've used that are available in the Whimsy store:

*NEW Winter Roses Background Rubber Cling Stamp   You're My Jolly Clear Stamps   Farmhouse Basket Stencil    Nuve - Deluxe Adhesive   VersaFine CLAIR Ink Pad - Nocturne (black)    Crafty Foam Tape White   Distress Ink - Mini Ink Pad Kit 3   Sparkletz - Barefoot Beach   Ranger® Artist Brushes Set   


Thanks for visiting me here today.


Hugs,


November 7, 2019

Seasons Greetings

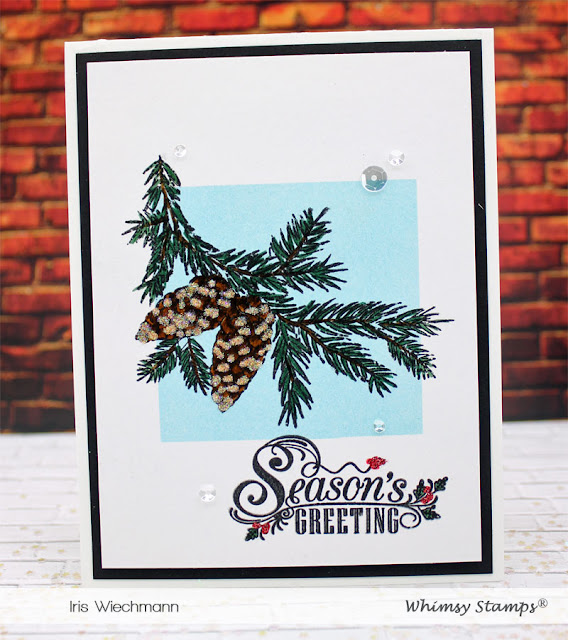
How are your Cristmas Cards coming along? Need some more inspiration? Here is another creation I made using one of the NEW Whimsy Stamps November stamps - Christmas Postcard.

I love this fir twig image with these beautiful cones. This is an image that can be colored fairly quickly and is a perfect choice for mass producing Christmas cards or for some last minute cards. I used my Tombow markers to color. 


To create the background I masked a square with some purple tape on a Mixed Media paper panel and applied Distress Ink Tumbled Glass with a ink blending brush. Then I stamped the image on top of the blue square with Versafine Clair Nocturn ink. For a bit of bling I've added Stickles and sprinkled some more Glamour Dust on top of it while still wet. The sentiment is included in the set as well and was stamped with Versafine Clair Nocturn ink again. I've added red Stickles to the berries on the sentiment and a few clear sequins finish off my card.


Here is the Whimsy Stamp's supply list for my card:
The link will bring you directly into the Whimsy Stamps store. I've used affiliate links. This is with no extra cost to you!


*NEW Christmas Postcard Clear Stamps    Nuve - Deluxe Adhesive    Crafty Foam Tape White   

VersaFine CLAIR Ink Pad - Nocturne (black)   DecoArt® Glamour Dust   Stickles Glitter Glue - Star Dust   

Sparkletz - Fun Flurries   

Thanks for stopping by! I'll be back soon with more inspiration projects from Whimsy Stamps!
So stay tuned! Have a good rest of the week.

Hugs,

November 1, 2019

Whimsy Stamps November Release - Bunny Delivery

Hello Everyone! It's this time of the month again - Whimsy Release Time! You will find the whole Whimsy November Release available in the store now!

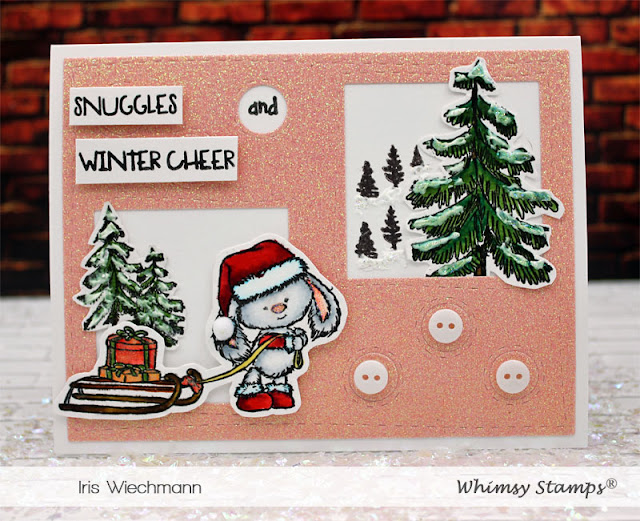
Here is my first project for this release using Bunny Delivery, colored with Karin Brushmarker Pro pens. This was also one of the Make&Takes at the recent Whimsy Workshop Weekend.

After coloring I fussy cut the images and trimmed the sentiments. I used foam tape to attach the images to the card front for a 3D effect.


The pink glitter panel is die cut using the Peekaboo Window 4 die.  Some glitter snow was added for even more dimension and to create a snow effect on the trees. A few added buttons complete my card.


Whimsy products used to create this card:


*NEW Bunny Delivery Clear Stamps   Peekaboo Window 4 Die   Nuve - Deluxe Adhesive    

Crafty Foam Tape White   VersaFine CLAIR Ink Pad - Nocturne (black)   


Thanks for stopping by!


Hugs,