June 25, 2019

Sleepy Sloth - Dreaming

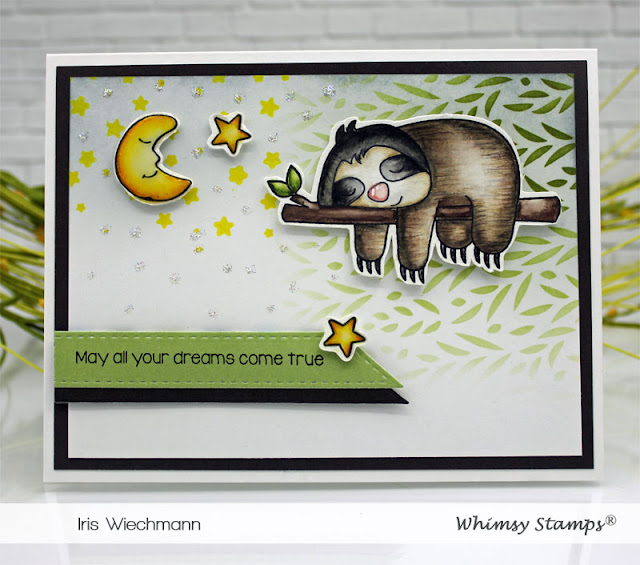
Hello Friends! I have another super cute image to share with you today from this months release. It's from the 'Sleepy Sloth' clear set by Deb Davis


I stamped the sloth, moon and stars onto Strathmore 400 Series mixed media paper, colored them using my Albrecht Durer watercolor pencils from Faber Castell and fussy cut the images.
My favorite coloring medium at the moment. If you follow my blog you know I love to change my coloring mediums frequently, depending on my mood. I actually do not have one single favorite medium, I love them all. I love to have the possibility to choose from a wide range of coloring mediums depending on the image I want to color, what effect I want to create or what I feel like coloring with at the moment. Sometimes combining different mediums. For me this is all part of the creative process of making my cards and projects.

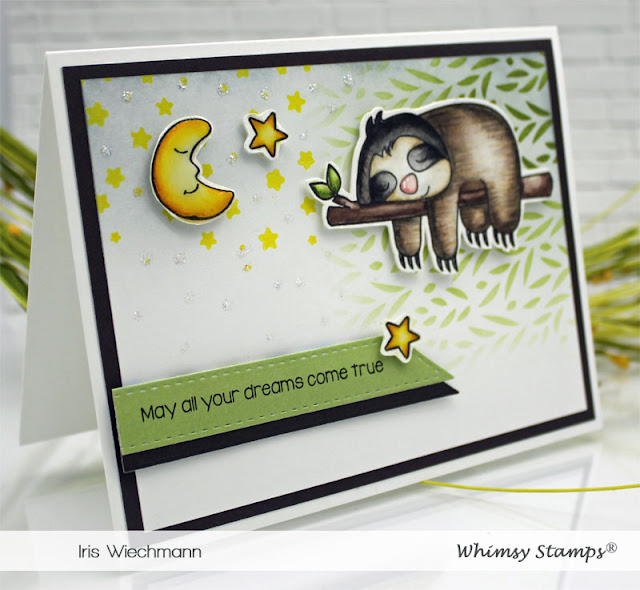
Here is a closer look at the little critter.

And here is a list of the colored pencils I used. I will be listing only numbers of the pencils colors. Because the names of the colors have changed over time not so the numbers and I have some older pencils with the old names on it. So to avoid any confusion numbers only:


Faber Castell Albrecht Durer Watercolor Pencils:

199, 177, 176, 175, 180, 173, 168, 132, 130, 232, 102, 107, 109, 186


The sentiment was stamped with Versafine Clair Nocturne ink onto a solid green sheet from the Otter 6x6 designer paper pack. I cut it out using a die from the Quick Strips set and layered it with black cardstock cut out the same way. To give some dimension and shine to the moon and stars I've added Glossy Accents.


I created the BG using the Farmhouse Greenery stencil and Versafine Clair Verdant ink. I used brushed to apply the ink, not so much a blending tool or a sponge. I bought some very soft but dense cosmetic blending brushes (they have the handle like a toothbrush not a regular brush, I think you know what I am talking about ;-) ) and they blend the ink like a charm. They work perfectly with stencils as well as you can see. The star cluster is included with the set and was stamped with Versafine Clair Cheerful ink  and I've added some sparkly dots with Stickles Stardust.


Here is a list of all the products I've used available in the Whimsy store:

Sleepy Sloths Clear Stamps   Quick Strips Die Set   Farmhouse Greenery Stencil
 *NEW 6x6 Paper Pack - Otters    Nuve - Deluxe Adhesive    

Crafty Foam Tape White   VersaFine CLAIR Ink Pad - Nocturne (black)   Stickles Glitter Glue - Star Dust   

VersaFine CLAIR Ink Pad - Verdant   VersaFine CLAIR Ink Pad - Cheerful   Glossy Accents  


Thanks for stopping by!

Hugs,


June 20, 2019

Caregiver Hugs - NEW Whimsy Cancer Stamp Sets

Hello Friends! Welcome to my blog today. I have a special card to share which I made using one of the NEW Whimsy cancer stamps sets releasing today.  Cancer Sucks, Caregiver Hugs, and Cause AwerenessUnfortunately, cancer has affected or will affect us all at some point.  While the the toll the disease can take on our lives can be heartbreaking, a word of encouragement or hug is always welcome.  It is our hope that these stamp sets will bring a smile or some hope to those in that valley. 

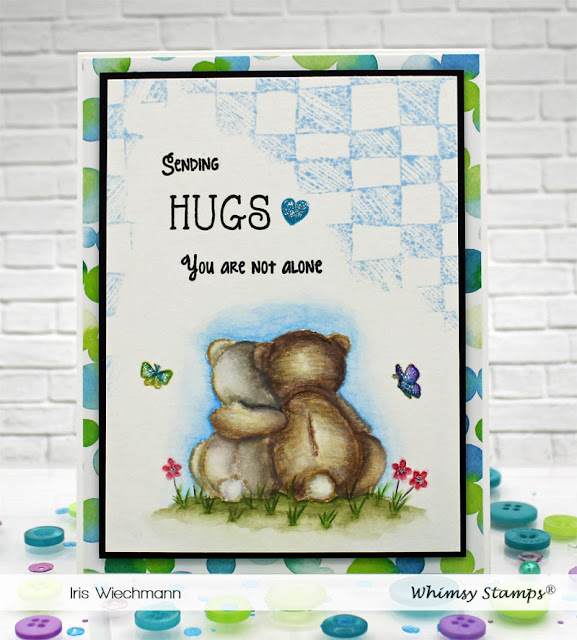
Here is my card using  Caregiver Hugs :

I colored the image with Albrecht Durer watercolor pencils and stamped onto Canson 140lb watercolor paper with Versafine Clair Nocturne ink.


Here is a shot from another angle and you can see that I've also added some sparkle to the image. I also used the new Checkerboard Doodles BG stamp and the Otter 6x6 designer papers


Several members of the Whimsy CT are also sharing beautiful creations using these sets so be sure to check them out.
Deb


Here are the Whimsy products I used for my card:

   *NEW Caregiver Hugs Clear Stamps      *NEW Checkerboard Doodles Background Rubber Cling Stamp   *NEW 6x6 Paper Pack - Otters    

Nuve - Deluxe Adhesive     Crafty Foam Tape White

VersaFine CLAIR Ink Pad - Nocturne (black)   Stickles Glitter Glue - Star Dust   


Thanks for stopping by today!

Hugs,


June 18, 2019

Art Journal Page - Gel Print BG & Spheres

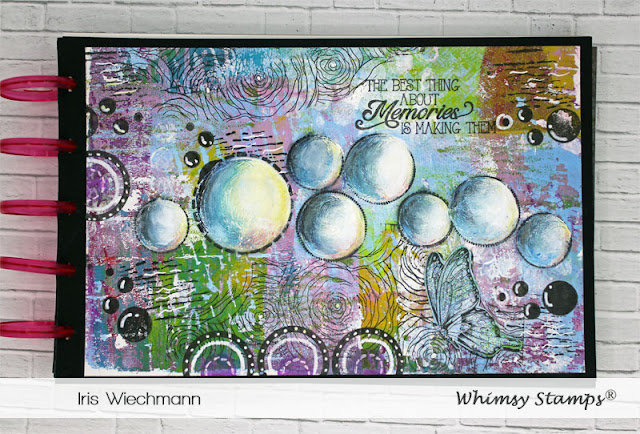
Hi All! Earlier this week I showed you an Art Journal Page already. Today I have another one that is also created using a gel printed background as base. The color scheme is different and also the technique I created the background. This one was made using a layering technique whereas the other one was done in a "watercolor effect" technique.
I used several stencils, BG stamps and clear stamps to create this page. The options are endless and you can use whatever stamps/stencils you like best. 

To add more texture and depth to my page I started by stamping some flowers with the Spiral Rose BG stamp and added details using the Circles, Circles, Circles, and Create a Beach Scene stamp sets. 
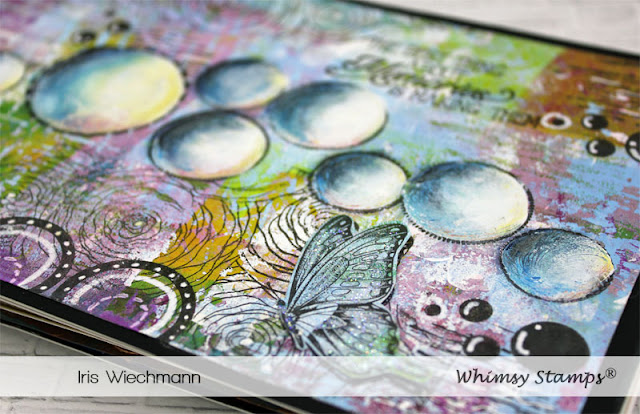
The circles cluster in the middle of the page was colored with white acrylic paint and distress crayons to look like spheres which gives the page a focal point as well as depth.

Here is a closer look:
I actually used just my fingers to color in the circles because it is easy to blend the crayons this way while the white paint paint is still a little damp.


The butterly is from the Butterflies Fluttering set and the sentiment from the Enjoy the Journey clear set. The finish touches were made using a white POSCA pen.


Here is a list of Whimsy products used:

 Butterflies Fluttering Set Rubber Cling Stamp   Circles, Circles, Circles Clear Stamps    *NEW Spiral Roses Background Rubber Cling Stamp   *NEW Create a Scene - Beach Rubber Cling Stamp   

 *NEW Enjoy the Journey Clear Stamps    Nuve - Deluxe Adhesive   VersaFine CLAIR Ink Pad - Nocturne (black)   

Stickles Glitter Glue - Star Dust 


Thanks for stopping by!

Hugs,

June 16, 2019

Art Journal Page - Gel Print BG Butterflies

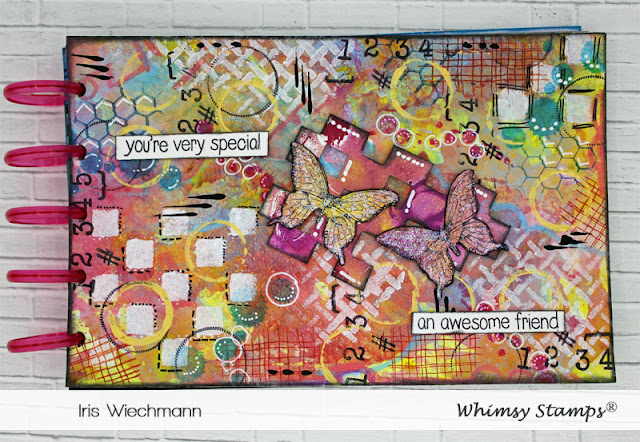
Hello Everyone! I have a very colorful project to share today. This is a journal page I've created using a gel printed background and then pimped using different techniques to add more depth and dimension. This was part of my Art Journal class at the Whimsy Retreat back in May.
My gel print pages are inspired by Kate Crane. I love her style and love to watch her mixed media and gel print videos. 


As you can see I used lots of different Whimsy products on this journal page. I have my gel printed background as a base and then I start adding texture with different stamps and stencils. I tend to use white first if the background is very colorful like this one to break it up a bit. I also use ink in the same colors I used already for my background to stamp. To make it even more pop I added black stamped numbers, circles and stripes. Finally I do some detailing using black and white pens.


To add a focal point I've added butterflies and part of a die cut background die. These elements where die cut from left over gel print pieces.


 Sentiments where stamped onto white cardstock to make them stand out more.


Here is a list of all Whimsy products used:

Distressed Backgrounds and Ink Splats Clear Stamps   Butterflies Fluttering Set Rubber Cling Stamp   Circles, Circles, Circles Clear Stamps    *NEW Checkerboard Die   

Farmhouse Basket Stencil   Typography Clear Stamps   *NEW You're Too Kind Clear Stamps 

 Nuve - Deluxe Adhesive   Crafty Foam Tape White   

VersaFine CLAIR Ink Pad - Nocturne (black)   Stickles Glitter Glue - Star Dust 


Thanks for stopping by!

Hugs,