

July 9, 2022
Wild & Free


July 3, 2022
Celebrate

Whimsy Stamps products used:


Thanks for stopping by!
Hugs,

July 1, 2022
Hakuna Matata - Whimsy Stamps July 1st Mini Release
When I saw this awesome lion family stamp 'mixed-media' jumped right into my head. So I went ahead and created a simple mixed-media card in an A2 size.

I first made the background using two earlier released stencils: Giraffe and Tiger Stripes. My background panel was cut from Strathmore mixed media cardstock and I used Memento Dye inks (Peanut Brittle, Potters Clay) and the NEW Whimsy blending brushes to stencil the BG. They are perfect for inking and the smooth and dense white bristles make for a soft and even ink application. I then stamped the image with Memento ink in Rich Cocoa onto the stenciled BG.
I cut out a mask for the image, adhered it and sprinkled the BG with Rich Cocoa and Peanut Brittle Memento inks. After everything was dry I used the Giraffe stencil to add a bit texture with NUVO Moonstone Glimmer Paste. The sentiment is included with the rubberstamp and was stamped onto kraft cardstock with Memento in Rich Cocoa.
Products used from the Whimsy store:


Wishing you all a wonderful Friday night and start into the long weekend!
Hugs,

June 30, 2022
Happy Campers
Gone Camping! Yeah well - noooo not so much...hahaha. I have to admit I don't like camping. I would rather spend my vacation time at home than in a tent or camper. Just not my thing.
Nevertheless the 'Gone Camping' clear stamp set from Whimsy is absolutely fabulous! I had so much fun creating this card and it is a fairly quick card to make as well. Read below how I did it.

I have found that as long as I don't over do it with the ink it works fine for me. Sometimes I heat set it to help it dry more quickly. I can definitely achieve the smoothest blends with this paper.
After inking my BG with Distress inks I stamped the trees and fire place. Then I took a white gel pen and added the stars. The tent and sentiment I stamped on white mixed media paper, colored the tent using my Karin Brushmarkers Pro and cut both out. I adhered them to the card front with some foam dots and finished off my card by adding a few confetti sequins from This Calls for Confetti.
Whimsy products used:


Enjoy the rest of your week!
Hugs,
June 29, 2022
Simple Foiled Thank You
Happy Hump-Day Everyone! Today I am sharing a simple foiled thank you card using one of Whimsy's newest word hot foil plates.

I used the Thank You word hot foil plate and foiled it with rainbow glimmer foil. To create the tag I used the Antique ATC Frames die set. To make it pop I cut out a bright blue frame using the Shaker Maker Rectangle die set. Some confetti sequins and an organza ribbon finish off my CAS card.
Whimsy products used:


Hugs,
June 28, 2022
You Are Roarsome

To create the background I spritzed black acrylic paint on the white card base. I then stamped the border and sentiment with versafine clair tuxedo black ink. After die cutting the dino image and adhering it to the the card front using foam dots, I sprinkled white acrylic paint all over the die cut with a brush. Two black enamel dots finish of my card.
Whimsy products used:


Seashell Friend
Hello! Have you seen the new adorable Clam Shell die set? This month Whimsy Stamps released a lot beachy and ocean related products.


June 25, 2022
Beach Frogs Thank You
Happy Saturday Crafters! The mini slimline card I am sharing today uses the newly released Beach Frogs from Whimsy Stamps again together with the new Ocean Fest BG stamp and Many Thanks clear stamp set.

The background was heat embossed in white on shimmering dark teal cardstock. I love this BG stamp. It is really versatile. You can stamp and color it, or stamp, color and cut out elements. Embossed on colored cardstock it makes for a quick but impressive background. After coloring the froggy image with watercolors I cut it out using the matching outline die. I then stamped thank you in black on white CS from the Many Thanks clear set and also used the matching outline die to cut it out. I adhered the sentiment and image with foam tape to the card front.
Whimsy products used:


Hugs,
June 22, 2022
Shabby Chic Thank You - Kiss My Donkey
I haven't done a card like this in years. When I saw the image I decided to color it with distress re-inkers. Another thing I haven't done in forever. While I was coloring I thought it would make a nice focal point on a shabby chic card. So I went back to my roots and pulled out all my flowers, pearls and embellies that have been sitting in my drawers untouched for a long time. I had a blast creating this card. I totally forgot how much fun it is distressing all the layers of paper and adding all the embellies. I have to do this more often again. 😍
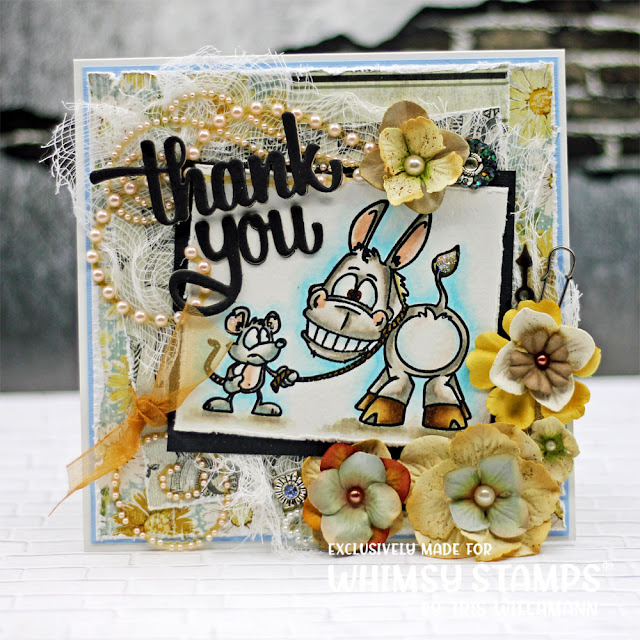
The papers I used for my card are from Whimsy's Farmhouse 6x6 paper pack that has been released last month. I chose three different designs from the Farmhouse papers and distressed all the edges with a distressing tool. I then layered them on top of each other (I of course cut them all to have different sizes). On top of the last layer I added some cheese cloth and a chiffon ribbon in a matching color.
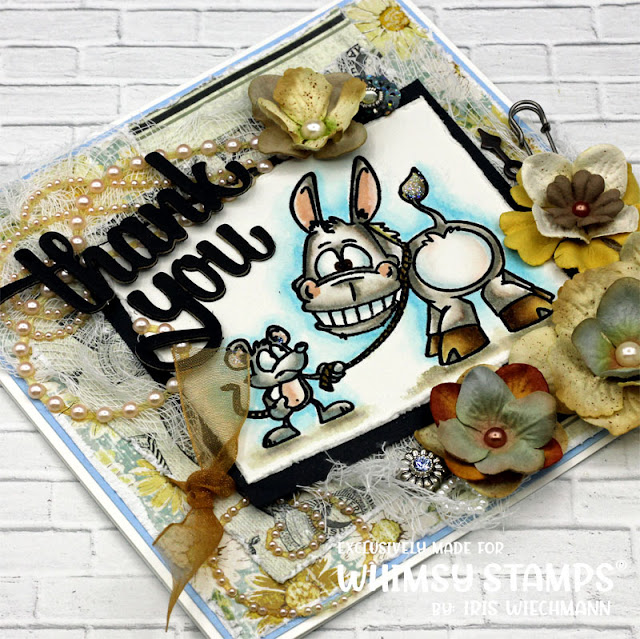
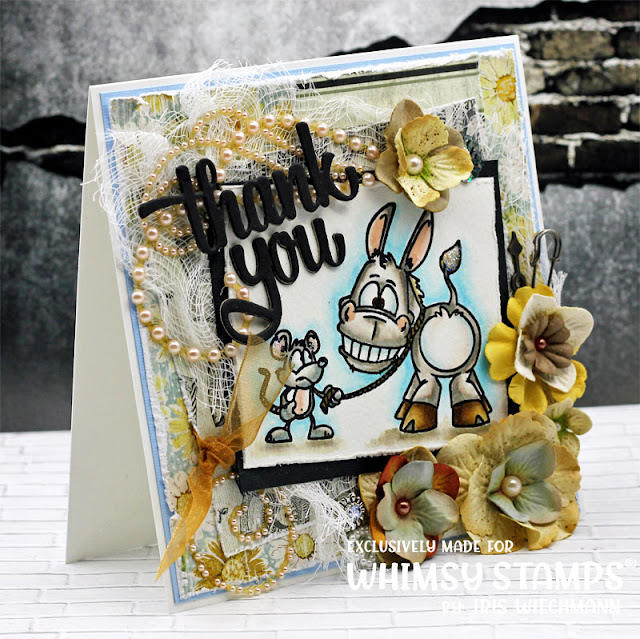


After adhering the image on top of a panel of black cardstock. I glued it on to the card front. I then cut out the 'Thank you' word die from black cardstock. Now it was time to add all the pearls, flowers, embellishments and of course the cut out word die. For a final touch I've added some stickles glitter glue to the image.

Distress re-inkers used:
Speckled Egg, Tumbled Glass, Antique Linen,
Pumice Stone, Tattered Rose, Gathered Twigs
Pumice Stone, Tattered Rose, Gathered Twigs
Whimsy products used:


Thanks for stopping by toaday!
Hugs,
June 20, 2022
Just Bee Cause - Bees and a Shaker Bauble
Happy Monday Everyone! It's the 20th of the month and that means it is time for another Whimsy Stamps Mini Release. I am showcasing a super cute bee clear stamp set by Krista Heij-Barber called Bee Happy.


I colored the cute bee images using Copics and pencils. The little bee who is burrowing it's head in the flower was added beneath the bauble together with the shaker mix. The other images are on top of the bauble as is the sentiment - which is included in the stamp set.

Copic Markers and pencils used:
Red: R24, 22, 21, 20
Yellow: Y19, 18, 15, 13
Black: N9, 7, 5, 2
Blue:B00, 000
Green: YG13, 17
Prismacolor Pencils: True Blue & Yellow Orange
FC Polychromos: Pale Geranium
Blue:B00, 000
Green: YG13, 17
Prismacolor Pencils: True Blue & Yellow Orange
FC Polychromos: Pale Geranium
Products form the Whimsy store:


Thanks for visiting and happy crafting!
Hugs,
Subscribe to:
Posts (Atom)